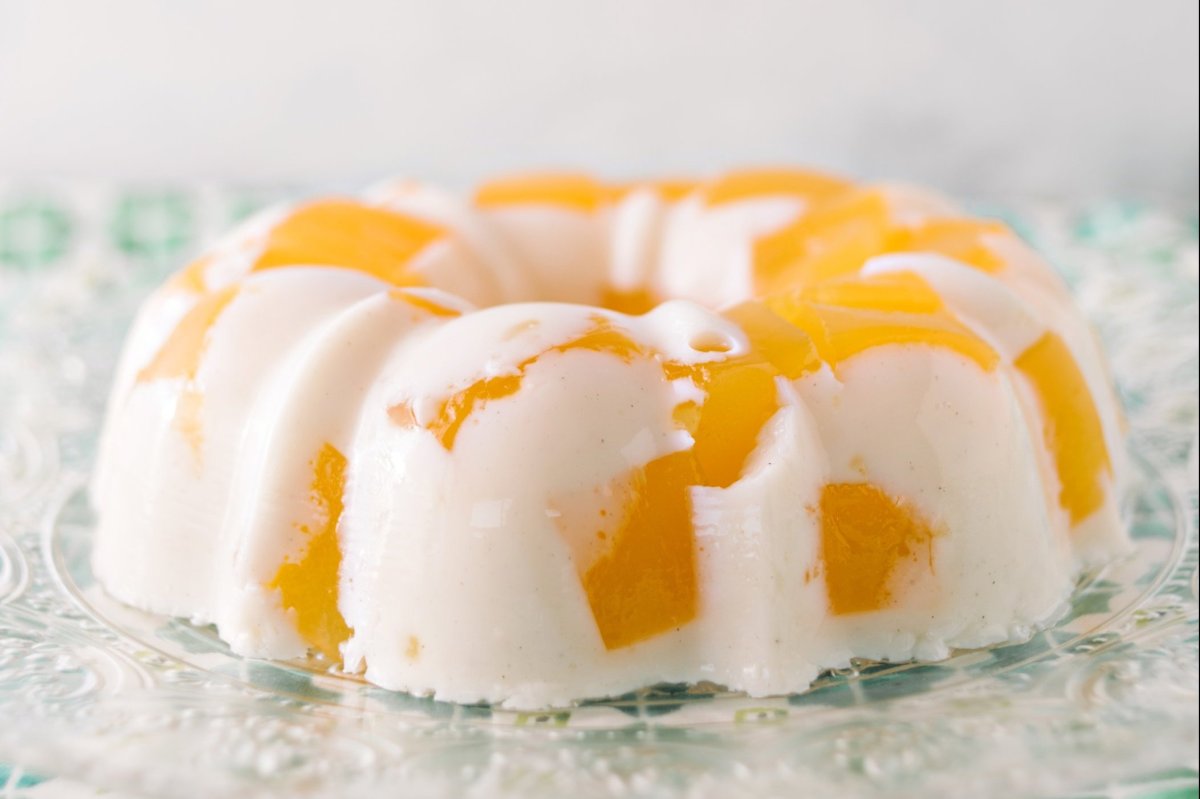
Baby boomers will know just exactly what I mean when I say that Jell-O was a staple of the era’s childhood. School lunches for baby boomers meant having green, red, and yellow jiggling Jell-O cubes as dessert. Fancy Jell-O molds were also all the rage at picnics and family get-togethers. This was because Jello-O was budget-friendly, easy-to-prepare, and didn’t leave crumbs. Some Jello-O were even used to stretch out leftovers and put a spin on these meals. It’s a totally nostalgic dessert that’s making a bit of a comeback these days. As a homage to this joyous, jiggly delight, try your hand at making this Creamsicle Jell-O Mold!
For this recipe, you’ll be making an orange filling and a vanilla base. Orange and vanilla is a refreshing combination that lets you enjoy the fruity sweet tang of oranges along with the rich and creamy taste of vanilla. Using vanilla bean ice cream, in particular, can get you a thicker and creamier consistency compared to the more subtle flavors of plain vanilla ice cream or French vanilla.
To get some really smooth Jell-O, wait until the gelatin softens and “blooms” before pouring boiling water for it to completely dissolve. When adding sugar, whisk until the crystals are also completely dissolved. Don’t forget to give your Jell-O mold a bit of a shake to release trapped air pockets so you don’t get Jell-O that looks a little like Swiss cheese!
If you’re really up for that pleasantly nostalgic vibe, you can use the classic Jell-O mold that resembles a dome-shaped flower with a hole at the center. I personally like using this type of mold because it’s easy to portion and looks simple but fantastic when served on a plate. Share this Creamsicle Jell-O Mold after meals or include it in your kids’ packed lunches!
Print
Creamsicle Jell-O Mold
Paying homage to an old baby boomer dessert, this Creamsicle Jell-O Mold is both nostalgic and fantastic!
- Prep Time: 20 minutes
- Chilling Time: 12 hours
- Total Time: 12 hours 20 minutes
- Yield: Serves 10-12 1x
- Category: Desserts
Ingredients
- Orange Filling
- 2 (0.25-ounce) envelopes unflavored gelatin
- 1/2 cup cold water
- 1/2 cup boiling water
- 1/2 cup sugar
- 2 cups fresh orange juice
- Vanilla Base
- 2 cups vanilla bean ice cream
- 3 (0.25-ounce) envelopes unflavored gelatin
- 1/2 cup cold water
- 1 cup boiling water
- 1/4 cup sugar
Instructions
- For the orange filling: In a medium bowl, sprinkle the gelatin over the cold water and set aside for 5 minutes. The gelatin will soften and “bloom.” Pour the boiling water over the gelatin and whisk until completely dissolved. Add the sugar and orange juice and stir to dissolve the sugar.
- Pour into an 8 × 8-inch dish and refrigerate for at least 4 hours, or until firm.
- For the vanilla base: Scoop the ice cream into a large bowl and melt in the microwave, about 2 minutes. Set aside to cool to room temperature.
- In a medium bowl, sprinkle the gelatin over the cold water and set aside for 5 minutes. The gelatin will soften and “bloom.” Pour the boiling water over the gelatin and whisk until completely dissolved. Add the sugar and stir to dissolve. Stir in the melted ice cream.
- Allow the mixture to rest and return to room temperature.
- Remove the orange filling from the fridge and cut into cubes. Transfer the cubes to a Jell-O mold of your choice. Gently pour the vanilla mixture over the orange cubes. Carefully shake the mold to release any trapped air pockets. Cover and refrigerate overnight.
- When ready to serve, fill a large container (or the sink) with hot water. Carefully dip the bottom of the mold into the water for 5 to 10 seconds. This will help release the Jell-O from the mold. Dry the bottom of the mold and invert it over a serving dish.
- Cut into slices and serve.
Did you ever have this classic as a kid?


 Previous

