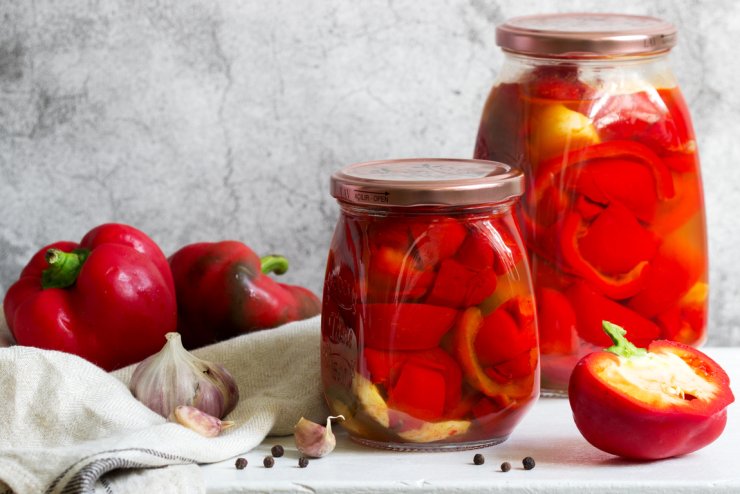
Quick Pickled Bell Peppers
One year when I was deciding what types of peppers to grow in my garden, I devoted one of my raised beds to bell peppers. I chose several varieties so I could have a range of colors come harvest time.
Well, that was the year of the great green pepper harvest! I must have chosen the best bell peppers to grow, because my oh my, were these plants productive!
I started off picking some of the peppers when they were ready and still green, looking forward to the harvest about three weeks later when the remaining peppers ripened to their brilliant colors. In the meantime, I had a lot of peppers.
I froze some raw, froze some roasted, made a lot of veggie kebabs on the grill. But still, I had a bumper crop of bell peppers. So I got out some mason jars and got busy.
The quick pickling method doesn’t require the equipment, experience, or expertise you need to do canning. I like this method not only for those reasons, but because I get the near-instant gratification of having tasty pickled peppers in just a day or two! And they last in the fridge for months—if you don’t snack away at them.
These quick pickled bell peppers make a great hostess gift if you’re invited over for dinner. Keep a few extra jars on hand to share with friends, or to have a no-fuss, ready-made garnish for sandwiches and crudité plates.
Print
Quick Pickled Bell Peppers
You know when to pick bell peppers. But do you know how to pickle a pepper? This Quick Pickled Bell Peppers recipe will give you crisp, tasty pickled peppers in as little as 24 hours!
- Prep Time: 10 minutes
- Pickling Time: 48 hours
- Cook Time: 1 hour
- Total Time: 49 hours 10 minutes
- Yield: 49 hours 10 minutes 1x
- Category: Sides & Sauces
Ingredients
- 2 pounds bell peppers, sliced (or enough to fill jars of your choice)
- Other raw vegetables of your choice (optional)
- 1 cup water
- 1 cup distilled vinegar
- 1 tablespoon salt
- 1 tablespoon sugar
- Optional: herbs and/or spices of your choice—a pinch of each
Instructions
- Slice the peppers into rings or strips and set aside.
- Slice other raw vegetables into bite-sized pieces and set aside (optional).
- Pack sliced peppers (and optional vegetables) into a clean mason jar. (Really pack them in so no pieces will be floating once you add the brine.)
- Bring the water, vinegar, salt, and sugar to boil in a saucepan. Add herbs/spices if you like.
- Pour the brine over the peppers to completely cover them.
- Close the jar lid tightly and let the jar cool completely on the counter.
- Put jar in the fridge and let the pickling peppers sit for at least 24 to 48 hours.
- Pickled peppers will store for up to 3 months in the fridge.
Notes
- Make more brine as needed to completely cover the contents of your jars.
If you have a fermentation kit, you can use a glass weight to keep the peppers submerged in the brine; remove it after the pickling process is complete.
Would you like to grow bell peppers? Bell peppers are one of the most popular home gardening crops. And no wonder: with so many varieties to choose, you can grow a whole rainbow in your garden! With the Beautiful Bell Peppers Gardening Guide, you’ll have everything you need to know about growing and enjoying this delicious fruit.
I love making pickled peppers. Have you tried these quick pickled bell peppers? What did you think? Please let us know if you made any changes or have any suggestions.


 Previous


If the jar lid seals during cooling do you have to keep the jars in the fridge?
Since this is just a quick canning recipe you should definitely keep them in the fridge, even though the jars have sealed. Quick canning is a much different process from pressure canning. If you’re looking for shelf stable peppers, please take a look at this post for some great information. https://foodgardening.mequoda.com/daily/food-preservation/pressure-canning-safety-rules-to-live-by/