When I was in school, I used to dread report cards. They always told me more about where I had slacked off than where I had succeeded. But as a gardener, I actually look forward to soil report cards. A good soil test doesn’t scold you—it guides you. It shows you what’s working well underground and what needs a little extra help.
The truth is, no matter how your garden looks above ground, the real story starts beneath the surface. Soil testing gives you the inside scoop. It’s like peeking into the pantry before you start cooking—you want to know what you’ve got and what you’re missing before you plan the meal.
Why Test Your Soil?
- Avoid Guesswork: Without a test, you’re just guessing at what your soil needs. Adding random amendments can waste money—or worse, harm your plants.
- Improve Yields: Balanced nutrients mean stronger, more productive plants.
- Save Time: Knowing your soil’s condition helps you focus on what really matters instead of trying every fix under the sun.
As Rachel from Indiana told me:
“Once I stopped winging it and sent in a soil sample, everything clicked. I’d been overfeeding nitrogen but starving my soil of potassium. My tomatoes forgave me the next season.”
Types of Soil Tests
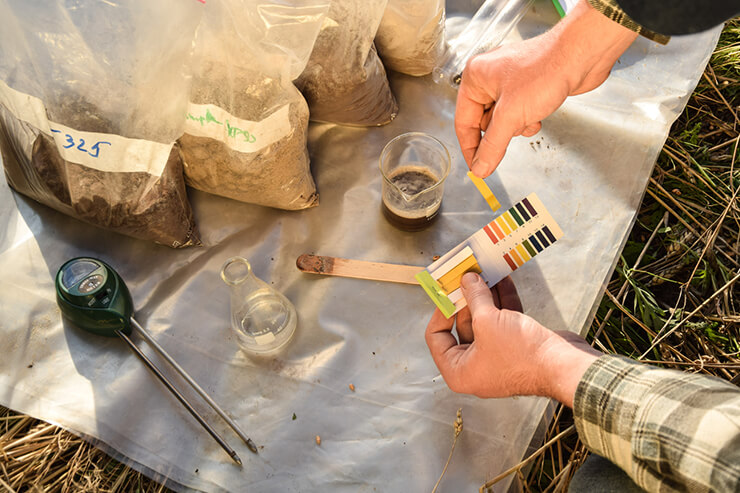
- DIY Home Test Kits
- Available at garden centers or online.
- Simple color-coded tests for pH, nitrogen, phosphorus, and potassium (N-P-K).
- Quick results, but less precise.
- Best for a fast check when you’re just starting out or adjusting on the fly.
- Professional Lab Tests
- Offered by state extension services or private labs.
- You send in a soil sample; results come back with detailed nutrient levels, organic matter percentage, and amendment recommendations.
- Costs a bit more ($15–$30 on average), but worth it for serious food gardeners.
- Some labs even customize recommendations for the crops you’re growing.
How to Collect a Good Sample
A soil test is only as good as the sample you give. Here’s the gardener’s playbook:
- Pick the right time: Test soil in early spring or fall when conditions are stable.
- Gather multiple spots: Don’t just dig in one corner—collect samples from 6–8 spots across your garden bed.
- Depth matters: For vegetables and herbs, take soil from about 6 inches deep. For orchards or perennials, go 8–12 inches.
- Mix it up: Combine samples in a clean bucket to get a representative blend.
- Air-dry before sending: If mailing to a lab, let your soil dry naturally—don’t bake it (you’ll kill the microbes).
Reading the Report Card
Most reports will highlight:
- pH: Is your soil too acidic, too alkaline, or just right?
- Macronutrients (N-P-K): The big three your plants need most.
- Micronutrients: Trace elements like zinc, iron, and boron.
- Organic Matter %: A measure of soil life and fertility. Aim for 3–5% as a baseline, more if possible.
It might look like a lot of numbers, but don’t panic. Labs usually provide clear recommendations—“Add 3 pounds of lime per 100 square feet,” or “Incorporate compost to increase organic matter.”
What to Do with the Results
- Amend gradually: Don’t dump in everything at once—soil prefers steady improvement.
- Go organic: Choose compost, aged manure, bone meal, or seaweed extracts instead of chemical quick fixes.
- Retest regularly: Every 2–3 years is usually enough unless you’re battling a specific problem.
A Gardener’s Lesson
I’ll never forget the year I tested the soil in one of my raised beds and found the pH at 5.2—too acidic for most of my vegetables. No wonder my beans were sulking. A sprinkling of lime, a few months of composting, and the next season I had beans climbing the trellis like they were auditioning for a circus act.
Key Takeaway: Soil testing is your garden’s report card. It’s not about passing or failing—it’s about learning what your soil needs so you can give your plants the best possible start.