If you have a beautiful garden that you’re proud of, you probably like to show it off. Maybe you invite friends and neighbors to pick from your garden, or have little farm-to-table dinners in your backyard, because why not? For me, I’m still a kid at heart, so I love a good pizza party, and there’s nothing better than grilled pizza. My garden soiree of choice is to invite people over for some grilled pizzas featuring the bounty from my garden (cheap and tasty – win win!)
Today I’m going to offer up a little outline I like to use when I have people over for a backyard pizza party, featuring a very simple homemade dough, with tips on how to grill it, a few sauce options, and the topping combos that taste totally delicious!
Making the Dough
In this recipe, I am using pizza crust yeast, but I’ve provided alternative instructions if you’re using regular active yeast. And if you really want to make life easier, you can buy pizza dough from your local market and start there.
My suggestion for the least stress is that if you’re using traditional instant yeast, create your dough one day ahead of time. All you’ll need to do is put the dough in a lightly oiled bowl at least twice the size of the dough, and cover it with plastic wrap and refrigerate overnight. The dough will rise slowly and be ready the next day. Then you let the dough come to room temp for about 30 minutes to an hour.
You can also make your dough, cut it into pizza-sized balls, and then put them on a greased baking sheet covered in plastic wrap to keep them moist overnight and then they’re ready the next day right away.
But first, let’s talk about the recipe!

Ingredients to make 8 mini pizzas:
- 1 package active pizza crust yeast (see alternative directions for regular instant yeast)
- 3 1/2+ cups all-purpose or whole wheat flour (add more if you need it)
- 2 tsp salt
- 1 1/2 cups warm water (120ºF)
- 2 tsp honey
- 1/4 cup olive oil
- Optional: you can add chopped rosemary or thyme into the crust if you desire.
Instructions if you use pizza crust yeast:
The only difference when using pizza crust yeast is that it’s faster to make. You can technically throw it on the grill right away. They do come out a little flatter than regular yeast but really they taste pretty much the same once you add the toppings.
- Grease a baking sheet.
- In a bowl, pour in flour, pizza yeast and salt. Mix for about a minute.
- Add wet ingredients and mix until smooth.
- Add more flour if you need to (if it’s too sticky to work with).
- Knead for about 8 minutes, or until the dough ball is uniform in texture, soft, and comes back when poked. Alternatively, you can use a stand mixer with a dough hook on low speed for about 5 minutes.
- Cut the dough into 8 equal parts (about the size of a baseball each) and use right away, or place on your greased baking sheet. Rub all the dough balls with a little more olive oil, then cover with plastic wrap tightly, and put in the refrigerator until ready to use (they’ll be fine in the fridge for 1-2 days if air-tight).
- At least 30 minutes to an hour before you want to cook, remove from the refrigerator and place on the counter to warm up, they may also rise a bit more.
Instructions if you use regular yeast:
- Grease a baking sheet.
- In a bowl, pour in active dry yeast and warm water. Let sit for 5-10 minutes until the yeast starts to bubble. Use a spatula to add oil, stir, then add flour and salt and mix until combined.
- On a lightly floured counter, knead for about 8 minutes, or until the dough ball is uniform in texture, soft, and comes back when poked. Alternatively, you can use a stand mixer with a dough hook on low speed for about 5 minutes.
- Cut the dough into 8 equal parts (about the size of a baseball each) and place it on your greased baking sheet. Rub all the dough balls with a little more olive oil, then cover with plastic wrap tightly, and either leave out on the counter for 30-60 minutes, or put in the refrigerator until ready to use (they’ll be fine in the fridge for 1-2 days if air-tight).
- At least 30-60 minutes to an hour before you want to cook, remove from the refrigerator, and place on the counter to warm up, they may also rise a bit more.

Grilling the Pizza
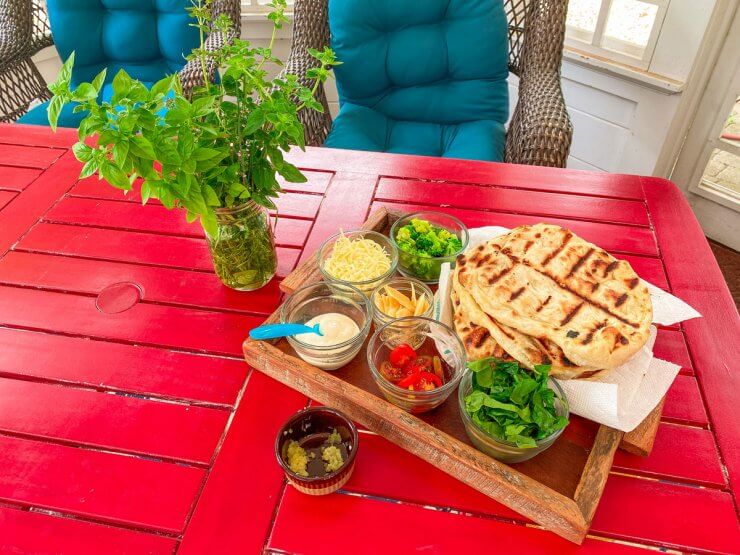
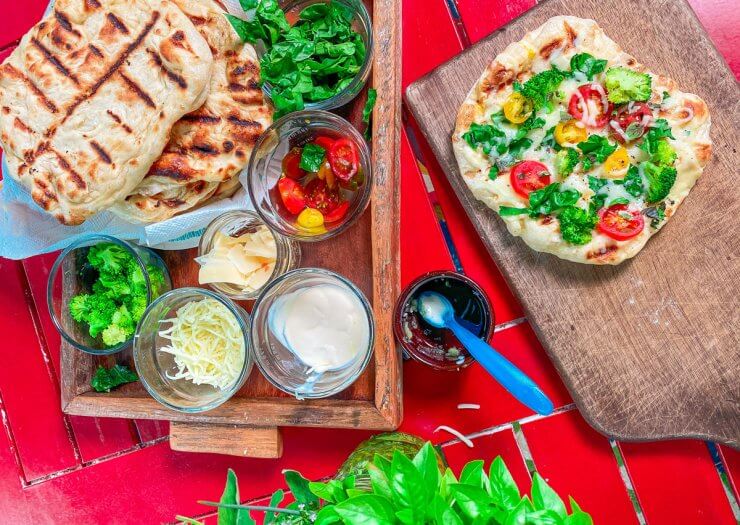
Don’t make the mistake of trying to grill a raw pizza with toppings in a pan on the grill, using the same mindset as the oven, ew! Instead, you’ll want a piping hot 500ºF grill and a pair of tongs. Grill the pizza crusts first, before inviting your guests to cover them with their favorite toppings.
Instructions:
- Prepare by greasing your grill with grill spray or a greased cloth. This will prevent sticking. Preheat the grill and get it to 500ºF.
- If you used pizza yeast, you can stretch the dough balls into pizza crusts and grill right away.
- If you used traditional instant yeast, once your dough has been on the counter for 30-60 minutes and has risen at room temperature, you can cook the dough balls pretty quickly.
- Simply pull out one at a time and use your hands to stretch them into pizza circles (spoiler: they won’t end up perfect).
- Place each stretched-out dough on the grill one at a time, and close the grill. Cook for about 1 minute until the top has bubbled, then open the top and flip (the dough should be puffed up and it should be very easy to flip). Cook for about 1 minute on the other side, then use tongs to set crust aside. Continue to do this for all the crusts.

Topping the Pizza
Here’s where all the fun comes in. I suggest creating herb bouquets on the table(s), that way guests can add their own herbs to their pizzas in a fun way.
Bases/Sauces for pizzas:
- Flavored Olive Oil – For a simple healthy base, your guests can simply use olive oil. I’d suggest a flavored oil such as basil or garlic-infused olive oil.
- White Sauce – For those who love a creamy white alfredo sauce, I’d suggest a pre-made or jarred white sauce from the grocery store to make your life easy. White sauce pizzas are most easily subbed out with olive oil.
- Tomato Sauce – For the traditional types, have some tomato sauce on hand. If you made it yourself from your garden, even better! You can even make two versions, one traditional and one for kids, simply blended smooth in a blender with a little honey to taste.
- BBQ Sauce – Your pineapple pizza lovers will appreciate a little BBQ sauce either as a base or a topping!
- Pesto – For a flavor-packed base to your pizza, a basil pesto works perfectly.
- Honey – For a sweet dessert pizza!

Toppings:
- Mozzarella cheese (sliced and shredded)
- Parmesan cheese
- Sliced cherry tomatoes
- Sliced onions
- Sliced shallots
- Scallions/green onions
- Chopped bell peppers
- Crumbled sausage
- Chopped bacon
- Chopped ham
- Pineapple
- Pepperoni
- Broccoli pieces (pre-steamed or blanched)
- Garlic scapes (pre-steamed or blanched)
- Chopped chives and chive flowers
- Grated garlic
- Goat cheese
- Feta cheese
- Caramelized onions
- Lots of fresh herbs
A few delicious combinations
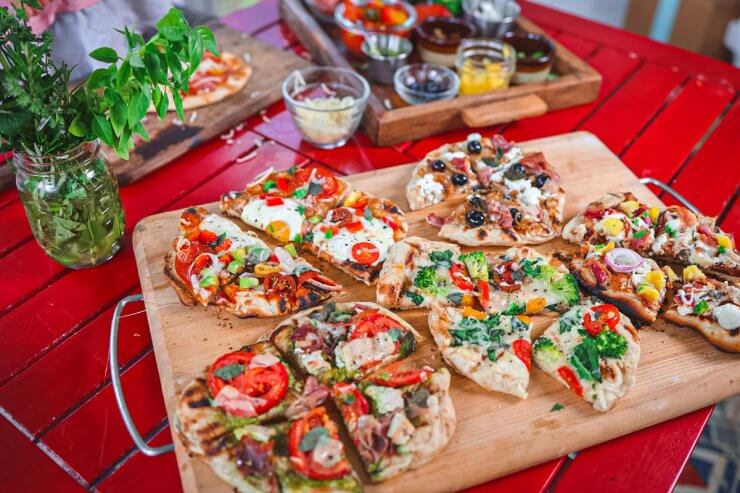
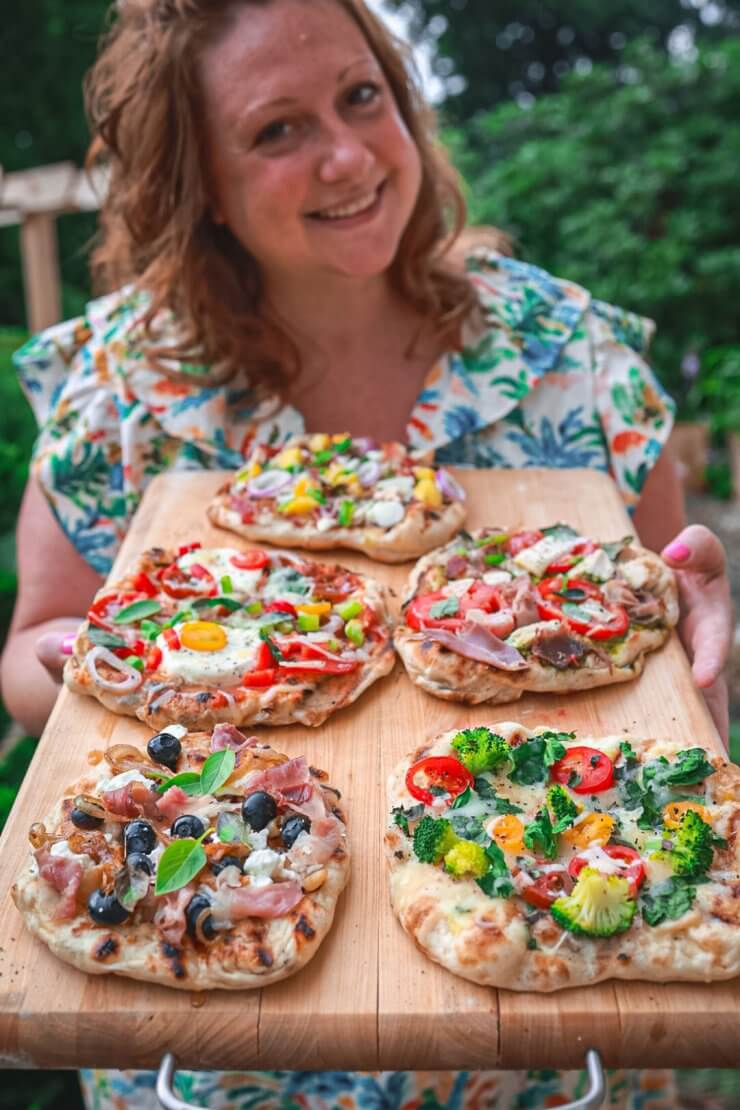
I tapped into some favorites and some recommendations from my friends to come up with a few totally delish combinations:
- Spinoccoli – White sauce (or olive oil) as the base, blanched broccoli, spinach, fresh grated/minced garlic, fresh sliced cherry tomatoes, low-moisture shredded mozzarella cheese, shredded parmesan, basil, oregano.
- BBQ Chicken – BBQ sauce as the base, red onions, cooked bacon, goat cheese, pineapples, grilled chicken, mozzarella, green onions.
- Chicken Pesto – Basil pesto as the base, sliced tomatoes, grilled chicken, parmesan, prosciutto, shallots.
- Supreme – Pizza sauce as the base, cherry tomatoes, bell peppers, pepperoni, shallots, fresh sliced garlic, sliced mozzarella, shredded mozzarella, basil.
- Dessert – Honey as the base, blueberries, goat cheese, caramelized onions, prosciutto.
Cooking the Pizza
This part is easy, simply turn down the heat on one half of your fiery hot grill, or turn it down really low so that all the toppings need to do is heat up. You can put all the pizzas on the grill at the same time, so that everyone gets served at once. Enjoy!
What other ideas do you have for a pizza party? Let me know how you do yours!


 Previous

