

Though cold winters may slow growth in your home food garden, production doesn’t have to stop entirely. Growing indoor microgreens can bring a vibrant and rewarding solution to your garden during colder, gray months, regardless of the weather outside. These homegrown nutritional greens are a fast, easy and nutrient-dense source that can bring a bountiful winter harvest to your kitchen.
How Microgreens are a Winter Harvest Game-Changer
As the name suggests, microgreens are small seedlings of common vegetables. Rather than waiting for the vegetables to mature fully, harvesting them just after the first leaves sprout offers higher nutrient concentrations in shorter growing periods.
Most seeds can be grown and harvested as microgreens, but the most common and most nutritious varieties include:
- Broccoli family: Broccoli, cauliflower, cabbage, kale, radish, turnip and more
- Amaranth family: Amaranth, spinach, beets
- Aster family: Lettuce varieties, endive, sunflower shoots
- Other examples: Carrots, scallions, pea shoots
Appreciating the Control of Indoor Cultivation
Winter growing techniques in an outdoor garden can lead to a beautiful landscape with cold-weather plants, but maintenance requires dedicated effort that may not yield the same nutritious crop production as warmer months. Plants like ornamental cabbage thrive in the cold, but sometimes, our own resilience to the weather can’t keep up with the plant varieties.
Instead, indoor gardening allows for continuous microgreen production without leaving the comfort of your own home. You gain several other key advantages with this indoor growing method, including stable temperatures, controlled light and optimized space with the tiny sprouts.
The Step-By-Step Guide to a Continuous Harvest
If you want to take advantage of the microgreen revolution, the following steps will prepare you for a kitchen garden harvest full of nutrients during the least expected season.
Assembling the Indoor Garden Kit
Because the sprouts are small, you don’t have to reserve a large amount of space in your home. Plan to have these items:
- Shallow containers with drainage, like perforated trays
- A growing medium, such as coconut coir, potting mix or even compost
- Microgreen seeds — these are not fundamentally different from the seeds for the mature plants, but some may be sold in bulk with specific treatments
- A pray bottle for watering
- An appropriate light source, like a windowsill or grow light
Keep in mind that many vegetables require varying amounts of sunlight. Partial-shade or deep-shade plants need as few as two or fewer hours, so consider what plants and varieties you want to grow when setting up your space
Maintenance From Seed to Sprout
Once you’ve prepared the medium and space for the seeds, you can begin sowing and watering. Soak the seeds overnight for 8-12 hours before drying and covering them for germination during the blackout period. They’ll germinate until they reach a certain height, indicating that they are ready for exposure to light. At this point, regular light watering and consistent sunlight exposure will facilitate growth.
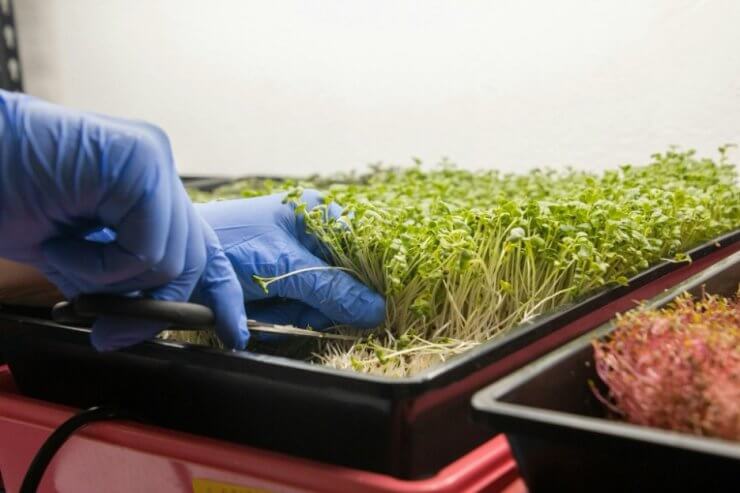
Microgreens can be ready for harvest in just a few days, depending on the plant species. Look for the initial signs of maturity — like the first leaf sprouts — to ensure they remain microgreens rather than continue growing to full maturity.
Staggering Crops for a Never-Ending Supply
Planting a new tray of seeds every few days can ensure continuous microgreen production, as it helps stagger the harvesting process. This process — also known as succession planting — ensures you aren’t harvesting large batches all at once and can instead harvest one batch every few days. This technique is especially useful for keeping up with the fast growth cycle of indoor microgreens while maintaining your gardening skills during the cold months.
Tips for Cultivating From Garden to Plate
The fast production and regular cycling of germination to harvest may require some careful planning, but the yield of a nutrient-rich crop is an excellent payoff. The following tips can help you navigate these winter growing techniques.
Choose Easy-to-Grow Varieties
While your favorite kitchen garden harvest plants can be grown as microgreens, certain varieties are more beginner-friendly. Plants in the broccoli family are versatile and mild, making them ideal for just about any meal you plan to incorporate into your winter diet. Pea shoots offer a savory and rich taste, and you can grow any of your favorite varieties, from sugar snap to black-eyed. Finally, try amaranth or mustard to bring color and even heat to your plate with little to no strenuous upkeep.
When to Harvest
Microgreens can be harvested in just 10-14 days while growing in ideal temperatures, but certain techniques can extend the shelf life of your produce. Researchers determined that pre-harvest calcium treatment extended broccoli microgreens’ shelf life by 21 days with a higher quality than non-treated greens. If you plan to preserve your greens, consider treatments as a part of the harvesting process.
Troubleshooting for a Flawless Harvest
Just like outdoor gardens, indoor microgreens experience common vegetation issues. Use these tips to mitigate the damage to your crops:
- Leggy, pale greens: If your plants become spindly and look unappealing, they likely require more sunlight or less heat. Ensure they are in a well-lit spot at a comfortable temperature.
- Mold or fungus growth: Prevent mold buildup by improving airflow and reducing humidity.
- Indoor garden pests: Ensure plants have healthy soil and proper drainage to reduce their susceptibility to pests like gnats.
- Slow germination: Consistent temperatures can help facilitate predictable germination times.
Your Winter Harvest Awaits
When cold winters keep you inside, bring your garden in with you. Microgreens are the tiny but mighty solution to ensuring you have homegrown nutritional greens all year long. Join the January microgreen revolution by starting your indoor garden today.