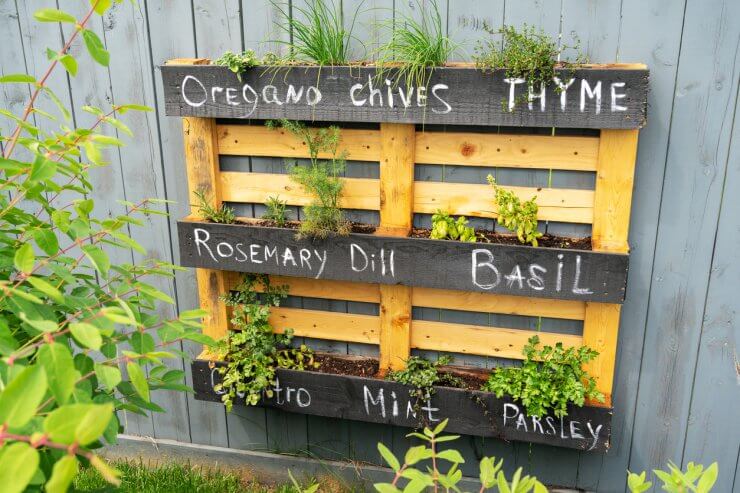
Wooden pallets are used to transport just about everything in this world, from cosmetics and electronics to home goods and manufacturing materials. And thanks to the dawn of Pinterest and other DIY websites and TV shows, pallets have been getting a new life, by being upcycled into furniture pieces, fencing, and even garden structures. In the garden, pallets make great trellises for climbing vegetables like pole beans and squash. You can also use them to create compost containers. One of my new favorite uses is building a pallet hanging garden for herbs.
There are many different ways to take advantage of vertical space in a garden, and a pallet hanging garden is a great example. Because the garden is self-contained within the pallet, this structure is especially useful for folks who don’t have a large garden area or no garden space at all. All you need is enough space to lean a pallet up against a structure.
Discover 7 top tips for growing, harvesting, and enjoying tomatoes from your home garden—when you access the FREE guide The Best Way to Grow Tomatoes, right now!
There are several ways to build a pallet hanging garden for herbs. The reason I chose to write about this particular method is that it doesn’t require power tools or any advanced carpentry skills, making it more universally accessible to gardeners of all skill levels.
Materials needed
- Wooden pallet
- Hammer
- Staple gun
- Landscape fabric
- Potting mix
- Herb seeds or seedlings
Make sure your pallet is safe to use
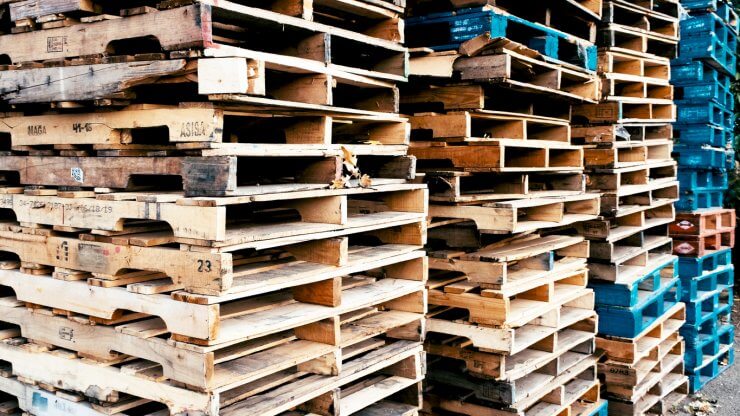
Not all pallets are created equal. In general, there are two types of pallets: chemical-treated and heat-treated. For use in growing any type of food product, only use heat-treated pallets. Most pallets will have markings on them letting you know the method in which it was treated.
When crafting your pallet hanging garden, look for a pallet with the marking “HT” which indicates heat-treated.
Avoid any pallets with markings that say “MB” which indicates the chemical treatment of Methyl Bromide, a dangerous pesticide.
Other markings you might see are “KD” meaning “kiln dried” which is not harmful, and “DB” meaning “debarked.” Both “KD” and “DB” indicate the way the wood was processed. Neither “KD” nor “DB” is dangerous as long as they don’t accompany the “MB” marking. When in doubt, don’t use a pallet unless you can identify that it was heat-treated.
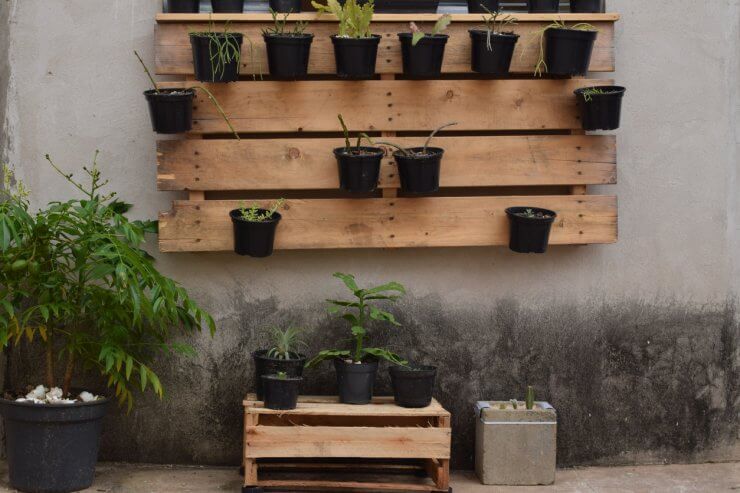
Note: If you are unsure of your pallet, and I often am, you can always affix pots to the pallet instead and create a vertical herb garden that way. I don’t recommend growing anything for consumption in pallets you’re unsure of. If your herbs are for decoration, or you want to build a planter for flowers, go for it. Otherwise, affix pots instead, like so:
Space out the pallet slats
Flip your pallet over. There should be three main “foot” slats, which will become the outside of each of your three herb boxes. There should be at least one slat behind them, that you will use to attach your landscape fabric. If there are more foot slats, carefully remove every other slat in your pallet using the back of a hammer. Be careful and remove or tap down any nails that might be sticking out. Spacing the slats out (if they aren’t already) will give your herbs room to grow in your pallet hanging garden.
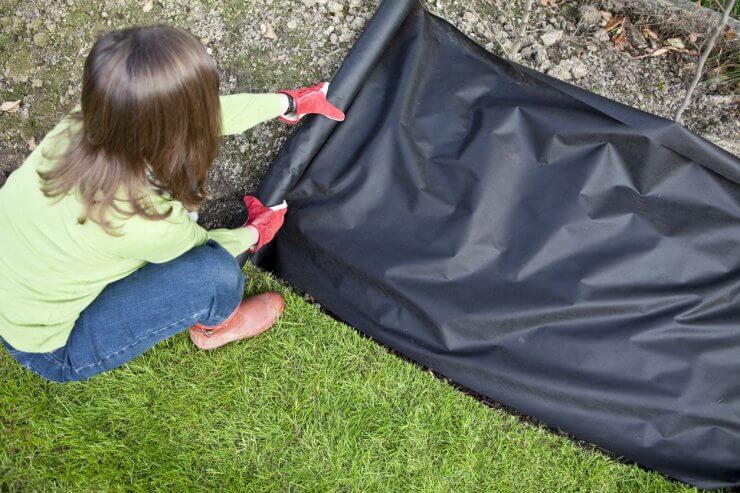
Staple landscape fabric
Attach landscape fabric to the bottom of each “garden box” using a staple gun. Depending on how your pallet is configured, you may need to make adjustments, but the landscape fabric should become the bottom of the garden box and wrap around the back slat. The fabric can billow a bit, giving you space to put potting mix, but not too much so that the dirt falls out. Staples should be close enough together to prevent potting mix from seeping through.
Place your pallet
Paint your “foot” slats any color you like for visual appeal, and add your herb names if you like. You can lean your pallet hanging garden up against a structure if you can’t really hang it, but bury the lower section a few inches in the ground if you can to make it stable. If you choose the “lean” method, I recommend attaching some kind of rope or cord to anchor it in place.
Otherwise, you can use good old-fashioned screws and anchors to affix your garden to a sturdy wall. Or, you can use rope if you have a way to hang it that way.
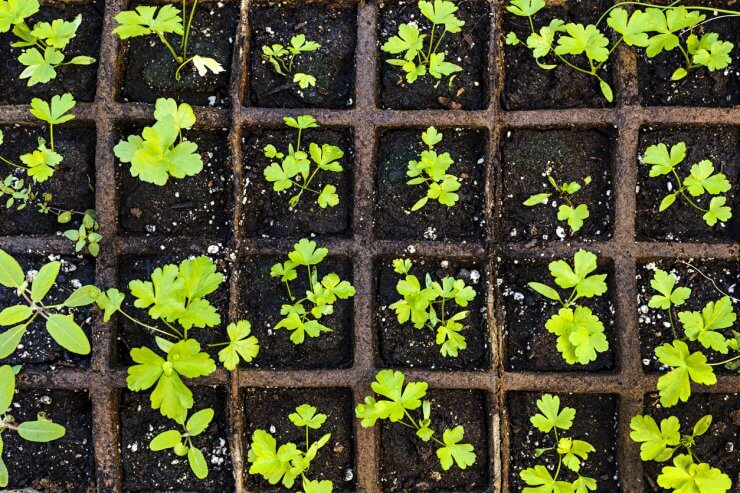
Add potting mix and herbs
Add your favorite potting mix to each pocket you’ve created from the landscape fabric. No need to add any additional drainage holes since the landscape fabric is porous and will drain well. Give your herb seeds and herb plants a good watering and watch as your pallet hanging garden grows! Since these herbs aren’t able to gather moisture from surrounding plants, you’ll want to keep an eye on their moisture. Depending on your typical rainfall, you may need to water them more frequently than if they were planted in the ground.
Once your pallet hanging garden is in place, find creative and fun ways to identify your herbs, either with paint, store-bought plant ID tags, or other fun signage using non-toxic paint.
Have you ever built a pallet hanging garden? Which method did you use? Let me know in the comments!
Discover 7 top tips for growing, harvesting, and enjoying tomatoes from your home garden—when you access the FREE guide The Best Way to Grow Tomatoes, right now!


