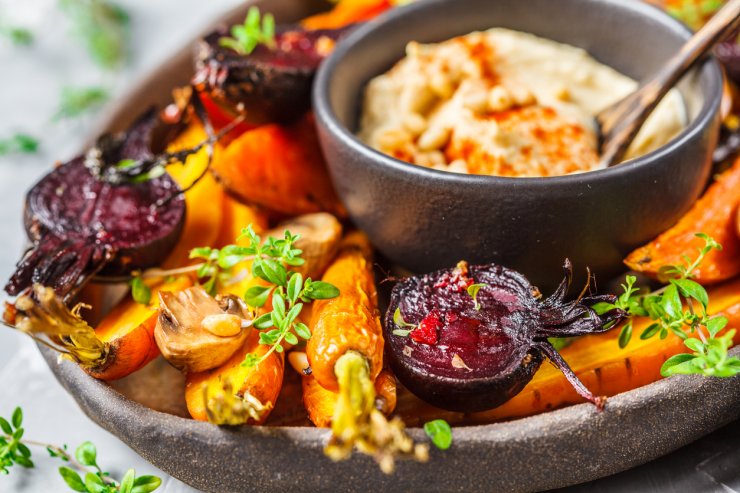
Do you remember being a kid and hating vegetables? I don’t think any child was exempt from the green bean gag reflex, and canned vegetables were purely to blame. For decades, kids were brought up on mushy watery veggies in cans that might have been on the shelf longer than they were alive. The lie that veggies were gross was carried from generation to generation for most families…except by those with gardens. Trust me, this recipe for cold roasted vegetables is entirely different! The veggies in this recipe are crisp, seasoned, and full of flavor!
The first time you try an al-dente roasted carrot, your life changes for the better. As you slowly realize that vegetables are grown in the ground and not in aluminum, your whole world changes. It’s for that reason you should get more roasted veggies in your life. If you’re already a gardener, you know this, but if not, I’m going to show you the most delicious and easy way to get roasted veggies into your diet with a recipe even the kiddos will enjoy, with this recipe for cold roasted vegetables and hummus.
Here’s proof – kid friendly! As you can see from the lemon juice and splashes of tahini on my daughter’s shirt, she had a big hand in making it too—something I find helpful getting her to try new things. She also loves carrots, so this was a roasted carrot-only edition.

Discover 9 garden recipes spotlighting the delicious possibilities of home gardens—when you access the FREEBIE Recipes from Your Garden, right now!
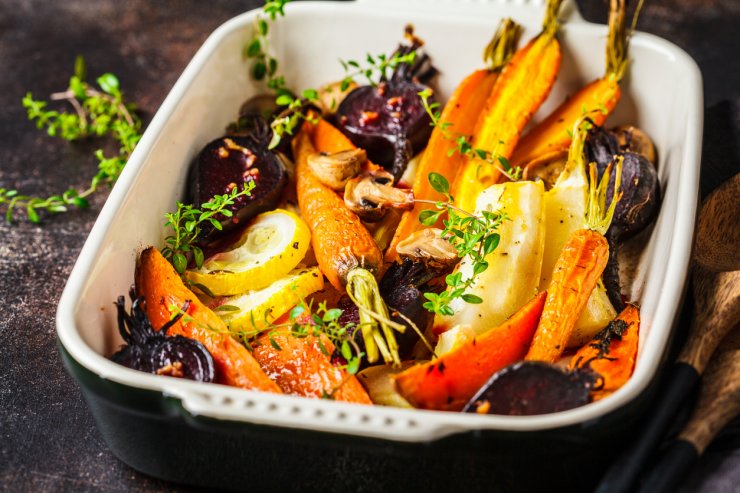
How to Make Cold Roasted Vegetables
This recipe is so easy and fast that you’ll be asking why you didn’t make it sooner. It’s perfect for a healthy lunch, and for an appetizer before a dinner party. The veggies don’t need to be served hot to enjoy, either, so you can roast veggies the day before, store carefully, and serve the next day (you can also serve hot if you like).
When your friends and family get a look at this platter, they’re going to think you’re extra fancy and only you’ll know how easy it was to prepare! So let’s get started! A good variety of veggies would be 5 carrots, 5 parsnips, 2 beets, 1 yam, 1 zucchini, and 3-5 whole peeled garlic cloves. You’re welcome to mix it up.
First, prepare your veggies. I prefer root vegetables like carrots, parsnips, and thick-cut zucchini or yellow summer squash because they can all be roasted and maintain their dipping stability.
You’ll also add whole peeled garlic cloves too, and add to the hummus later.
If you have petite carrots or parsnips, say 6″ or less, you can peel and then slice them down the middle to create two halves—this is my preferred method. However, if you have larger veggies, you can also cut them into sticks, 4-5″ long.
Try to keep the sticks around the same size so that they cook evenly. On a baking sheet, drizzle them with walnut oil, or olive oil, and sprinkle with salt, pepper, and garlic powder and toss to cover. Generally I like to add fresh herbs to everything, but they can get in the way once you get to dipping, so sticking to the simple stuff is best for this recipe.
Bake at 450 for about 10 minutes for root veggies, a few minutes less for softer veggies like zucchini, or cut thicker sticks. Put in the refrigerator to chill when done. Keep tabs on the garlic if you cook longer, because they don’t need more than the original 10 minutes.
You can make these the day before, or right before you make the hummus because they’ll have some time to cool while you’re busy boiling water and chickpeas, and then making hummus.
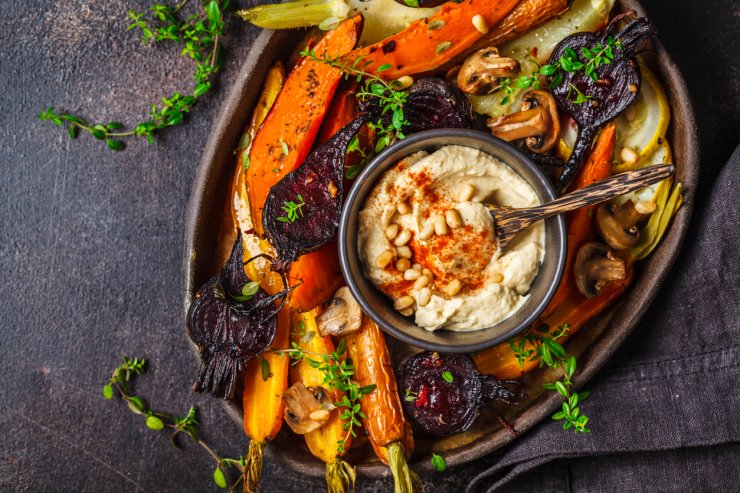
How to Make Fresh, Warm Hummus for Dipping
To make ultra-creamy hummus, start with chickpeas cooked with a bit of baking soda, a tip from a famous Israeli chef, Michael Solomonov, known for his amazing hummus.
You’ll need: two 15oz cans of chickpeas, 1/2 tsp baking soda, 1/2 cup tahini, 3 lemons, 3 cloves of garlic, 3/4 tsp salt, 2 tbsp walnut or olive oil, 1/2 tsp cumin and paprika for garnish.
Bring a small sauce-pot filled halfway with water to a boil. Drain two cans of chickpeas and add to the boiling water, with 1/2 tsp baking soda. Bring to boil, then reduce temperature to simmer for 25 minutes. When done, strain and set aside.
Mix up your tahini (it’s separated in the can), then add tahini to food processor. Half lemons, and squeeze juice into the food processor, using your hand or a strainer to catch the seeds. Add the roasted garlic. Add salt. Turn food processor on and let run for about a minute. Add chickpeas (some people remove shells, but we’re not in this recipe). Then, turn back on and process for at least a minute. Add cumin and process again. Then, add walnut or olive oil slowly and process for a minute. To get the texture you want, add a tablespoon of water at a time at this point to your desired creaminess.
To serve, sprinkle with paprika and drizzle with walnut or olive oil and enjoy with your chilled veggies!
If you’re wondering whether you can use a blender, the answer is yes, but it’s thick, so a $15 blender might be frustrating. If you have the type that won’t even start making smoke if you tried to blend an iPhone, then that’ll do just fine. You can add a splash of cold water as you go, as needed, to get it going if it gets stuck.
Print
Cold Roasted Vegetables and Warm Hummus
Pair these flavorful cold roasted vegetables with warm, lemon and garlic hummus for a great party platter or healthy lunch dish for families.
- Category: Entrées
Ingredients
- 5 carrots
- 5 parsnips
- 2 beets
- 1 yam
- 1 zucchini
- Salt, pepper & garlic powder
- 3 cloves garlic, peeled (or more if desired)
- 2 15oz cans of chickpeas
- 1/2 tsp baking soda
- 1/2 cup tahini
- 3 lemons
- 3 cloves of garlic
- 3/4 tsp salt
- 2 tbsp walnut or olive oil
- 1/2 tsp cumin
- paprika for garnish
Instructions
- Prepare your veggies. If you want a garlicky hummus, add extra whole peeled garlic cloves too, to add to the hummus later.
- If you have petite carrots or parsnips, say 6″ or less, peel and then slice them down the middle lengthwise to create two halves. If you have larger veggies, you can also cut them into sticks, 4-5″ long. Try to keep the sticks around the same size so that they cook evenly.
- On a baking sheet, drizzle them and the whole garlic with walnut oil, or olive oil, and sprinkle with salt, pepper, and garlic powder and toss to cover.
- Bake at 450 for about 10 minutes for root veggies, a few minutes less for softer veggies like zucchini, or you can cut thicker sticks. Put in the refrigerator to chill when done. Save the garlic for the hummus.
- While the veggies are cooking, bring a small sauce-pot filled halfway with water to a boil. Drain cans of chickpeas and add to the boiling water with 1/2 tsp baking soda. Bring to boil, then reduce temperature to simmer for 25 minutes. When done, strain and set aside.
- Add tahini to food processor. Half lemons, and squeeze juice into the food processor, using your hand or a strainer to catch the seeds.
- Add roasted garlic and salt. Turn food processor on and let run until thick.
- Add chickpeas (some people remove shells, but we’re not in this recipe). Then, turn back on and process for at least a minute. Add cumin and process again. Then, add walnut or olive oil slowly and process for a minute.
- To get the texture you want, add a tablespoon of cold water at a time at this point to your desired creaminess. To serve, sprinkle with paprika and drizzle with walnut or olive oil and enjoy with your chilled veggies!
Notes
- Yes, you can make this in a blender, but depending on the strength of your blender, it might take more patience, adding a splash of cold water as you go to keep it from getting “stuck”.
If you try this recipe, I’d love to hear what you think! Everyone loves to personalize their hummus recipes, so I encourage you to taste-test as you go, with more or less lemon, garlic, and cumin. Leave a comment below with your tips and tricks for making cold roasted vegetables and hummus!
Discover 9 garden recipes spotlighting the delicious possibilities of home gardens—when you access the FREEBIE Recipes from Your Garden, right now!




Wish you provided a print option for your recipes. Thanks.
I agree with you; what good is a recipe if not easily accessible?
Here’s what I did. I saved it to Apple Books-the recipe is on two of the last 3 pages. ( I suppose I could print and scan those 2 pages only, but that’s extra effort.)
I also email recipes with RECIPE (as first word) in the Subject line, so I search RECIPE and/or file these recipe emails in a separate folder.