

Pickling is so much fun, but there’s a lot of confusion around it, so many people are a little afraid to do it! I totally get that too, because fermented pickles are a science show all on their own. But that’s not the only way you can pickle, and in fact, there are many ways to do it.
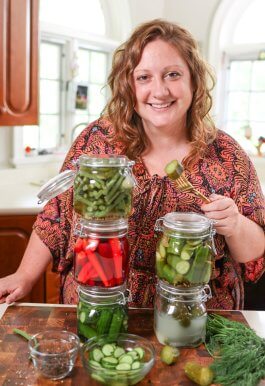 I learned how to pickle from Noa Berman-Herzberg. Also known as the “Serial Pickler,” she turned me on to the idea that if there’s any vegetable you don’t love, that you should try pickling it first! This has totally changed my tune on bland veggies like radishes, and bolder veggies like beets. As a bit of a purist, my favorite things to pickle are cucumbers, carrots, and green beans, though you may find me pickling red onions on special occasions when there’s a special meal or cheese board on my horizon.
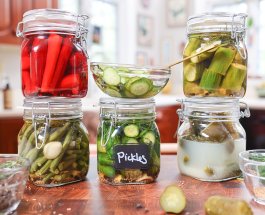
In this video and article, I’m going to show you how to make three types of pickles:
- Quick countertop pickles are made with vinegar, honey, salt, and spices. You can make and use them almost right away.
- Refrigerator pickles are made with vinegar, water, and kosher salt. They can be eaten the next day or within a few days.
- Fermented pickles use water and kosher salt, and will ferment over the course of two to four weeks. These are the types of pickles that have probiotics that are good for your gut.
Quick countertop pickles, which I’ve shared before in How to Make Pickles from Garden Cucumbers Without Canning, is as simple a recipe as it gets.
- Use thin Persian-style or mini cucumbers and slice them into rounds at least ⅛”, or thinner if you like, and add to a small bowl.
- Add 2 tbsp apple cider vinegar, 1/2 tbsp honey, 1/4 tsp salt, peppercorns, or a few cracks of freshly ground peppercorns, and mustard seed if you have it, then toss.
- Let sit for at least 15 minutes while you cook dinner, then enjoy on top of burgers, dogs, sandwiches, or alone with a fork!
Refrigerator pickles are what most people tend to make, because of their simplicity. I learned how to make these through a pickling class at a fancy hotel in Rhode Island from their head chef. Once you taste them, you’ll recognize the flavor from your favorite cheese boards and pickled platters, and now you can make them at home!
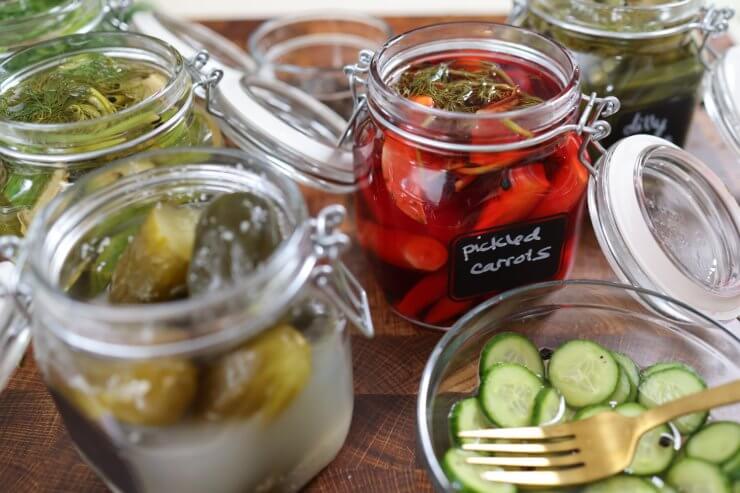
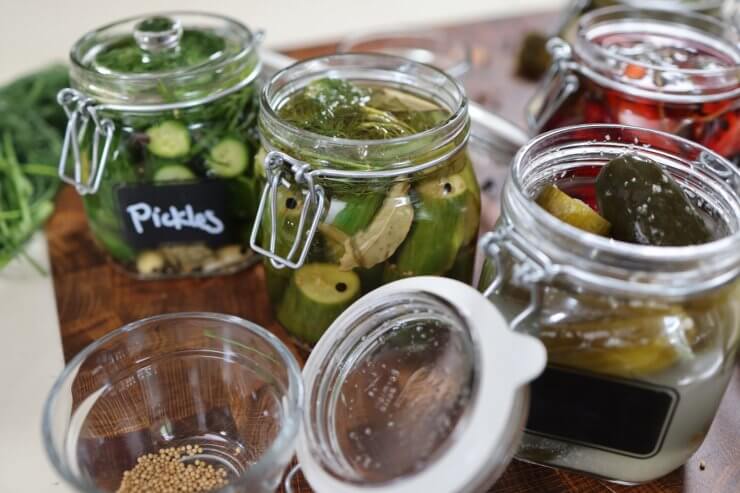
To make them, all you need is a bundle of thin-skinned cucumbers or pickling cucumbers (or carrots, or green beans) to fit your jars, whole peppercorns, mustard seeds, and bay leaves for aromatics, whole cloves of garlic, and fresh dill. Then, you’ll just need vinegar, kosher salt, and water for the brine.
First, trim your veggies so that they’ll fit nicely in the jar. For cucumbers, trim off the ends and pre-salt the cut cucumbers in a bowl to extract any excess water and help them stay crispy.
Next, fill your sterilized jars with the vegetables, a sprinkle of the aromatics (you can also use coriander and other spices) and begin to make your brine.
To make the brine, you’ll need 1.5 cups vinegar to 1 cup filtered water to 1 tbsp of kosher salt. You can double or triple this depending how many jars you are making, but it’s better to make extra than not enough. Add any more aromatics to the brine, bring to a boil, then take off the stove.
Pour the hot brine into your jars, and then leave the jars open until they totally cool. Close the jars and store in the fridge for up to a month.
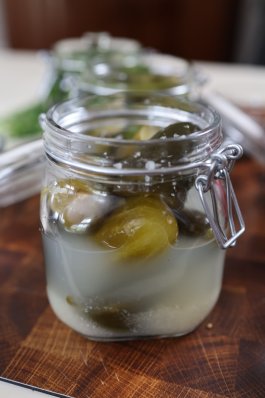
Fermented pickles (see the cloudy brine? That’s good!) Note – this jar is missing a pickle or two, which is why the brine level isn’t completely to the top!
Fermented pickles are last but not least, and making them isn’t much different than refrigerator pickles, except you’re not using vinegar.
For a pickle brine using cucumbers, follow the same rules as above, except for the brine, use 1 cup of filtered water to 1 heaping tablespoon of kosher salt (or 1 tablespoon and 1/2 teaspoon kosher salt).
Bring the brine to a boil, but let it cool to a warm temperature (about 30 minutes) before pouring in the jars. We do this because we want to seal this one right away after pouring to reduce any risk of contamination.
Use a sterilized shot glass or fermentation weight to make sure everything in the jar is covered by brine, and then close the lid and store away in a cabinet or basement that’s around 70 degrees—too hot and they will ferment too fast, and too cold, they will ferment too slow. Wait about a month before opening.
Another way fermented pickles is different from refrigerator pickles is that the whole darn batch might go to heck if you don’t follow a few simple rules:
- Sterilize, sterilize, sterilize, everything: your hands, the jars, the seals on the jars, and anything the veggies will touch before going into the jar.
- Only use the freshest of vegetables, because if you use any kind of rotted veggies, even ones that are just kind of soft, that will ruin the whole batch.
- Throw away the batch if it looks or smells weird at all. Your finished pickles should have a cloudy, milky-looking brine, and they should smell like pickles. If they have any kind of mold or smell “off” just sacrifice the batch and try again.
You’ll find the full how-to in the video above, along with tips and tricks for getting delicious crispy pickles every time.
Note: If you happen to like that yellow tinge that shelf pickles have, just add some turmeric.
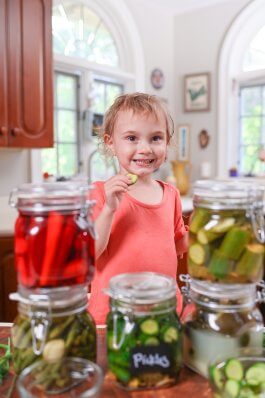
We have a great collection of pickle recipes you can make that will please the palates of everyone young and old!
- Pickled Onions | Red onions transform into a tasty treat when you pickle them. Have a jar ready to top burgers, tacos, salads, and more. These are quick and easy to make.
- Pickled Okra | This “pickle” recipe doesn’t require the full array of canning equipment that some recipes do. Enjoy the extra bite of habanero in each jar!
- Pickled Avocado |These pickled avocados will become your new obsession. Serve them in salads or on their own with lunch or dinner.
- Pickled Gooseberries | If you have more fresh gooseberries than you can handle and you already have some in the freezer, try this quick and easy pickle recipe for a sweet-tart twist. They’ll be ready in a month—and worth the wait!
- Pickled Ginger | Take your freshly harvested ginger and make a little something to serve in or alongside sushi, soups, sandwiches, and more. If you like sushi ginger, this recipe is for you!
- Pickled Ginger Carrots | If you wind up with a bumper crop of carrots—or if you’re just looking for a fresh way to whip up a tasty snack—pickled ginger carrots will hit the spot with a little zing!
What are your tips and tricks for pickling? I’d love to hear them!


My daughter-in-law’s nickname is pickle.
The Pickle Faeries came along and sneaked a pickle out! Love these recipes and thank you so much for taking the time to give these to us, and also for the photos, darling little girl too!
Why if you completely filled the fermented pickles with brine did the final product look like a quarter of the brine was gone?
Hi! So I quickly mentioned in the video that I had already gotten started on them, this is a jar we were already snacking on at my house. 🙂 They’re big pickles so they left a big gap, I just wanted to show what a finished brine would look like. I just made a caption on the article photo to clarify, thanks for pointing it out!