I never thought I’d become such a ginger devotee. Only a few years ago, my relationship with this knobby rhizome was limited to the occasional slice of pickled ginger alongside sushi. Is that even real ginger? I don’t know, but that all changed when an anthroposophic nurse introduced me to a simple, comforting broth made with just a few cloves of garlic, a knob of ginger, gently boiled for 20 minutes, with a pinch of salt. Before that day, I never even wondered how to use ginger, but from that point on I’d either be growing my own or gobbling it up from the local farmstand.
That first sip was a revelation. The smell, the subtle heat, the way it seemed to nourish me from the inside out – I was hooked. Now I sip it almost daily in the winter. Of course, being the tinkerer I am, I couldn’t leave well enough alone. I started experimenting, swapping in bone broth for extra richness, adding a splash of tamari for depth. Now, this ginger-centric concoction (which, I’ll admit, never follows an exact recipe) has become my go-to comfort sipping broth.
As I delved deeper into how to use ginger, I discovered its versatility extended far beyond that initial broth. I found myself whipping up zippy ginger dressings, brewing potent tinctures, and even trying my hand at growing my own. Each new application deepened my appreciation for this incredible plant. If you haven’t watched my video on 17 Home-Grown Home Remedies, you should – ginger is used a lot!
Now, let me share with you everything I’ve learned about how to use ginger – from nurturing it in your garden to making the most of its flavor and potential health benefits in your kitchen. And I also encourage you to leave a comment with your own uses for home-grown ginger.

Growing Your Own Ginger
Choosing Your Ginger
When it comes to growing ginger, not all rhizomes are created equal. Here’s what you need to know:
- Thin-skinned vs. Thick-skinned: For home cultivation, opt for thin-skinned varieties like Hawaiian Yellow or Japanese White. They’re generally easier to grow and have a milder flavor. Thick-skinned types, while more common in stores, can be trickier for beginners.
- Look for Buds: When selecting ginger to plant, choose pieces with visible growth buds or ‘eyes’. These are the points from which new shoots will emerge.
Planting and Care
- Start Indoors: In most climates, it’s best to start ginger indoors about 6-8 weeks before the last frost date.
- Soil Matters: Use a rich, well-draining potting mix. Ginger loves slightly acidic soil (pH 6.0-6.5) packed with organic matter.
- Water Wisely: Keep the soil consistently moist but not waterlogged. Ginger appreciates humidity, so consider misting the leaves regularly.
- Patience is Key: Ginger is a slow grower. It may take several weeks for shoots to appear, but once they do, growth will accelerate.
Harvesting Your Homegrown Ginger
Here’s where the science gets interesting. Unlike many crops, ginger doesn’t require a specific “curing” process after harvest. The rhizomes continue to develop their characteristic flavor compounds even after being dug up.
To harvest:
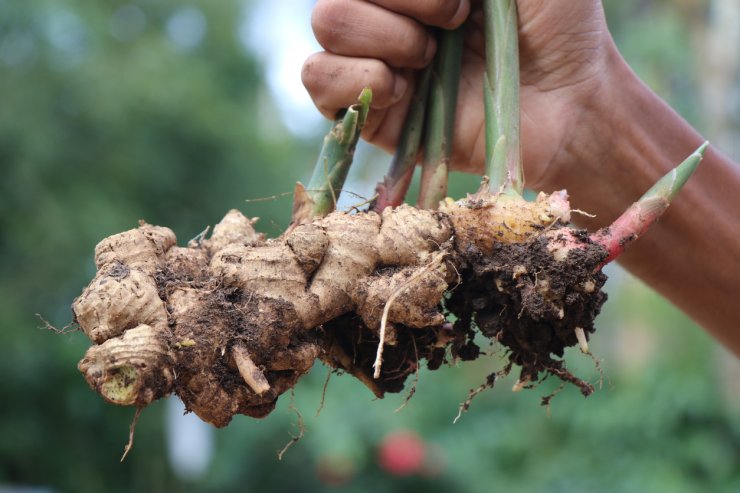
- Gently dig around the plant, being careful not to damage the rhizomes.
- Shake off excess soil and rinse gently.
- Allow the ginger to dry in a warm, well-ventilated area for a day or two. This helps to slightly toughen the skin for storage.

Storing and Preserving Your Ginger Bounty
Now that you’ve mastered how to use ginger in the garden, let’s talk about preserving your harvest.
Freezing Ginger
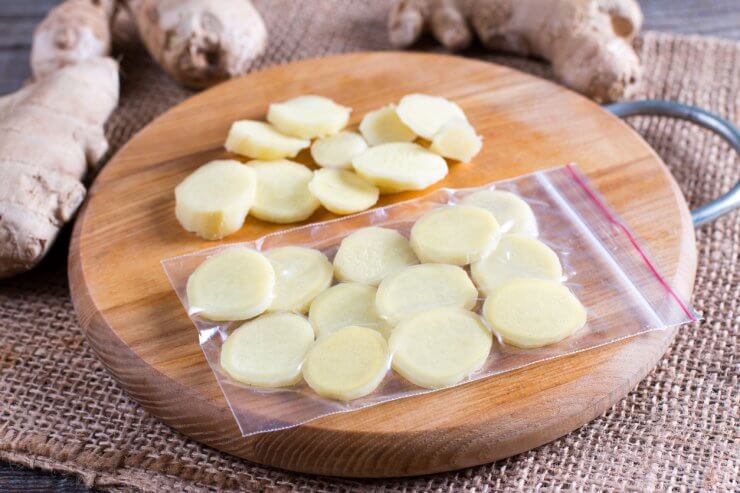
Freezing is an excellent way to extend the life of your ginger. Here’s the lowdown:
- To Peel or Not to Peel: This is a matter of personal preference. I find that unpeeled ginger freezes just fine and is easier to grate when frozen. However, if you prefer to peel, go for it!
- Whole vs. Grated: You can freeze ginger whole or grate it first. For convenience, I like to grate a portion and freeze it in ice cube trays. Once frozen, pop them out and store in a freezer bag for easy portioning.

Ginger in the Kitchen: Beyond the Broth
Ever wonder what gives ginger its characteristic heat? It’s all thanks to a compound called gingerol. This oily substance is chemically related to capsaicin (the compound that gives chili peppers their kick) and piperine (responsible for black pepper’s bite).
Interestingly, when ginger is dried or cooked, gingerol can transform into shogaol, which is even more pungent. This is why dried ginger often tastes spicier than fresh!
When it comes to using ginger, it’s not one-size-fits-all. Different varieties of ginger lend themselves to different uses in the kitchen and beyond. Let’s explore how to use some common types of ginger:
- Common Ginger (Zingiber officinale)
- Culinary: Grate fresh into stir-fries, use in baking (gingerbread, cookies), or steep for tea
- Medicinal: Make a soothing tea for nausea or upset stomach
- Preservation: Pickle thin slices for sushi or crystallize for a sweet treat
- Pro tip: Freeze whole pieces and grate as needed for easy use
- Galangal (Alpinia galanga)
- Culinary: Slice thinly and add to Southeast Asian soups like Tom Kha Gai
- Flavor infusion: Bruise and add to coconut milk-based curries for depth
- Aromatic paste: Pound with lemongrass and chili for authentic Thai curry pastes
- Note: Unlike common ginger, it’s typically not used grated due to its fibrous texture
- Yellow Ginger (Zingiber cussumunar)
- Culinary: Use in milder dishes where you want ginger flavor without overwhelming heat
- Beverages: Excellent for making ginger tea or adding to smoothies
- Garnish: Its beautiful color makes it great for garnishing plates or cocktails
- Tip: Try substituting it for common ginger in dessert recipes for a more subtle flavor
- Red Hawaiian Ginger (Zingiber officinale var. rubrum)
- Culinary: Use in dishes where you want a spicier kick and a pop of color
- Pickling: Its vibrant hue makes for visually striking pickled ginger
- Juicing: Add to fresh juices for an extra zing and potential health benefits
- Caution: Use in smaller quantities than you would common ginger due to its intensity
Remember, how you prepare ginger can significantly impact its flavor. Here are some general tips:
- For a mild flavor: Use larger pieces and remove before serving
- For medium heat: Grate or mince finely
- For maximum impact: Juice or blend into a paste
No matter which variety you choose, always start with a small amount and adjust to taste. Ginger’s flavor can be potent, and it’s easier to add more than to try to balance out an overpowering dish. Remember, there’s no one “right” way to use ginger. Experiment and find what works best for you!
As we wrap up this exploration of how to use ginger, I hope you’re feeling inspired to incorporate more of this amazing rhizome into your life. Whether you’re cultivating it in your garden, experimenting with new recipes, or simply enjoying a comforting cup of ginger tea, there’s always more to discover.
For those of you eager to dive deeper into ginger cultivation, be sure to check out our comprehensive Ginger Gardening Guide. It’s packed with even more tips and tricks to help you grow the best ginger possible.
Now, I’d love to hear from you! What’s your favorite way to use ginger? Have you tried growing it yourself? Share your experiences in the comments below – let’s keep this ginger conversation going!


 Previous

