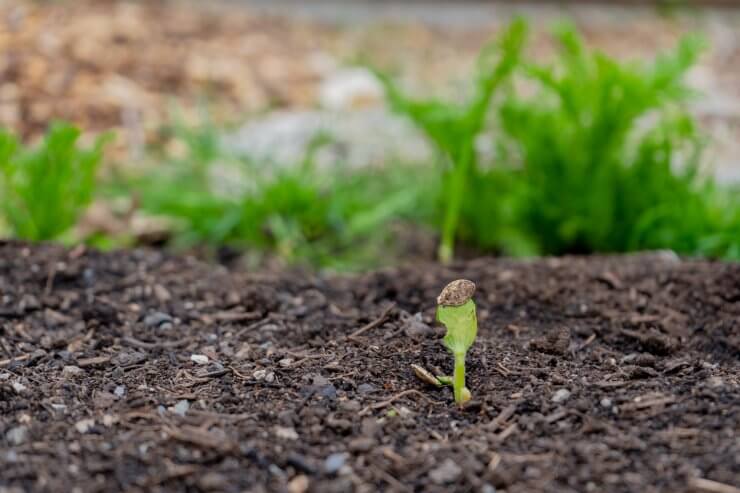
Squash seedling emerging out of the garden soil
If your growing season permits it, direct sow your seeds outside; seedlings do not transplant as successfully as plants started outdoors. If you have a shorter growing season, you can get a jump on planting time and start your squash seeds indoors. You’ll just need to give those seedlings a little extra TLC.
Seed Planting Process
Squash seeds take a week or two to germinate, so plan ahead. If you live in a cooler area, you’ll want to get started early. Some people like to give their seeds a head start for germinating by soaking them in warm water overnight.
Indoors

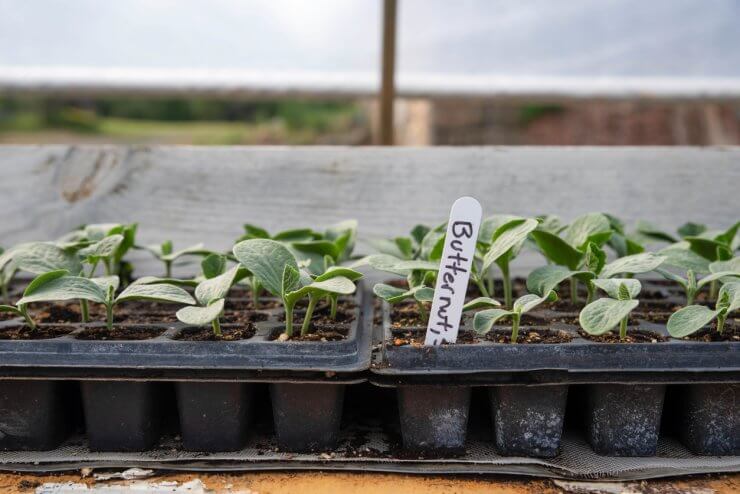
Butternut squash seedlings growing indoors
Even though squash prefer direct sowing, you can get them started indoors. Sow your squash seeds indoors four to five weeks before you plan to plant them outside. The outside soil temperature needs to be warm—70 degrees F, and the inside temperature where you’re starting your seeds should be greenhouse warm—80 to 90 degrees F. Plant your seeds with the narrow edge facing up and keep them lightly watered. Plant your seeds in individual soil compartments so you disturb the seedlings’ root systems as little as possible when you transplant them.
Once your seedlings emerge, they are going to need plenty of light. A heated mat and grow lights will help; a cover will help keep the temperature warm. Leave the lights on for 16 hours, off for eight hours. Don’t leave the lights on 24/7 as most plants need a little darkness to grow.
Once your seedlings begin to grow, you’ll want to harden them off before you transplant them to your garden. So, about three to four weeks after you plant the seeds, give your new seedlings a little sheltered outside time, starting with an hour or two a day in indirect sunlight, progressing to a full day outside. Bring your seedlings in for the night after each outdoor foray—especially if there’s a threat of frost. This process helps strengthen the plant’s cells, giving them a better chance of thriving when you transplant them.
Your garden soil temperature should be at least 70 degrees F before you set your seedlings in the ground. When your seedlings are ready for outdoor garden time, have appropriately sized and spaced mounds for them, depending on the cultivar. Pop the seedlings out of their little containers and put them right into their outdoor home. Don’t disturb the soil or root ball; the less you fuss with them, the better.
Cover the roots and attached soil with fresh garden soil and give them a good drink of water. A row cover can help protect your seedlings from boring insects while they’re getting established. It can be something as simple as putting down row cover material and weighing the edges down with stones, bricks, or tucking the edges into a trench and weighing it down with soil. Just be sure to raise the level of the row cover as your seedlings are getting established.
Sowing directly in the garden
Winter squash really prefer to grow where they’re planted, so direct seeding is best. Squash seeds can go in the ground as soon as the soil temperature has reached at least 70 degrees F. Get a soil thermometer and check your garden bed to make sure the soil is not too cold. For spring planting, wait until after your last frost and the soil has warmed up.
For vining varieties, prepare hills 2 to 4 feet apart—or more, depending on your cultivar, with rows 3 to 8 feet apart—again, the exact distance will depend on the type of squash you’re growing. Your seed packets will have precise information. Plant five to six seeds in each hill.
Germination should occur in a week or two. Keep the soil moist but drained. When your plants are 2 to 3 inches tall, thin them to 3 inches apart.
Once your seedlings are established, thin them to just three plants per hill. Don’t disturb the root systems of the plants you’re leaving; just use garden snips to cut the stems of the seedlings you’re thinning.
Have you tried growing winter squash from seeds or seedlings? Which method do you prefer—and why? Please share your experiences with us.


 Previous


I prefer from seed. Why spend the extra $ when it only takes 2 weeks for your seedlings to be the size ‘they’ sell at the stores or nurseries. And virtually every seed germinates.