Nothing gets me more excited than being able to grow veggies and herbs in the winter while there’s snow on the ground outside. And you can do the same if you get into hydroponics, the art of growing food without soil. There are many variations of it, including soil-free growing mediums and systems, which makes it even more fun.
There’s a lot of ground to cover here, so we’re going to walk through five very different forms of hydroponics, starting with the basics like sprouts and microgreens, and moving our way up through aquaponics and different “smart” hydroponic systems like the AeroGarden and the vertical Gardyn system.
Sprouts (3 to 5 days to harvest)
While sprouts are the babies of the hydroponic realms, they’re not the least maintenance (that award goes to microgreens). Sprouts are the baby roots that form from seeds and are consumed before they get all green and leafy. They are full of nutrients, much like microgreens, and they’re pretty easy to grow, but not without fault.
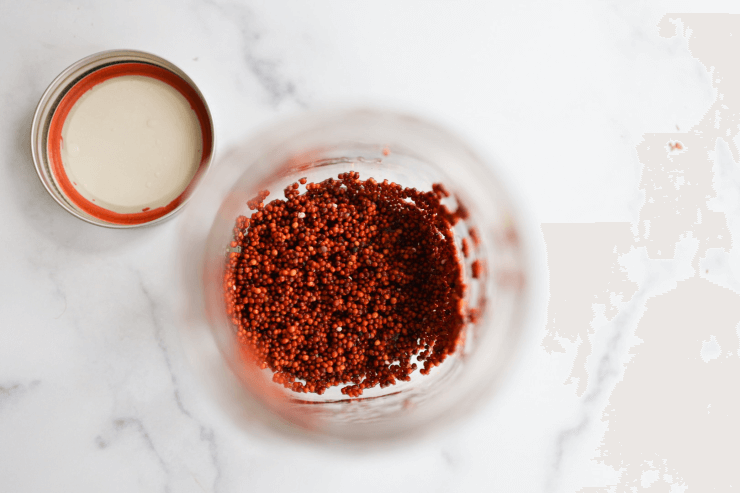
To grow sprouts, all you need is a mason jar, microgreen seeds (like broccoli), cheesecloth, and water. On day one, you will put 1 to 2 tablespoons of seeds into a sterile mason jar with a couple of tablespoons of warm water, close the lid, and let the seeds sit overnight. In the morning, you’ll open the jar, cover the top with cheesecloth and strain out the water. Add new water, swirl, drain again, and cover (this time there shouldn’t be excess water left inside, that’s only for night one). The next morning, add water again, swirl, drain, and cover. At this point, you may already have sprouts, and you’ll continue this each day until you have a jar full of sprouts that are mostly white and starting to turn green. Then you can use them as garnish and in salads for an extra dose of vitamins.
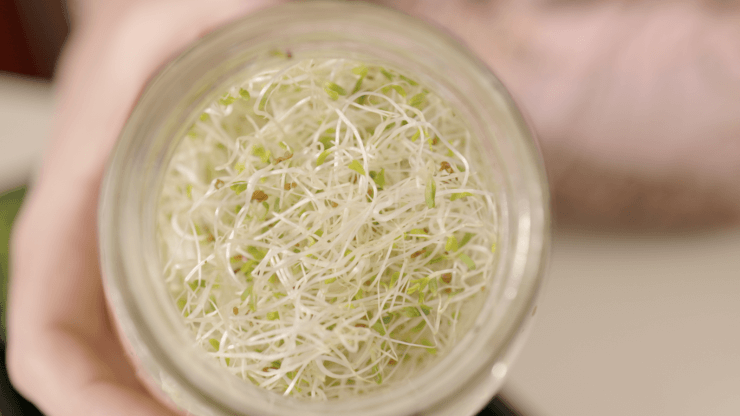
- Pros of growing sprouts: A simple and fun way to grow a nutrient-rich garnish for salads and other dishes.
- Cons of growing sprouts: It does take a little work and consistency. Sprouts are also easily contaminated, so just make sure you are using sterile jars and a new piece of cheesecloth each day. If you’re feeling weird and unsure, simply eat them cooked in dishes rather than raw, however, sprouts grown at home are much safer than those handled by many people in grocery stores and beyond.
Microgreens (7 to 10 days to harvest)
Like sprouts, microgreens are baby plants, though you wait for them to mature into small stems and leafy greens before consuming them, and you trim them from the growing medium you’re using, you don’t eat them whole. Now I know we’ve been down this road before in my Growing Microgreens: Kits vs. DIY article and video, but let’s revisit growing microgreens hydroponically, shall we?
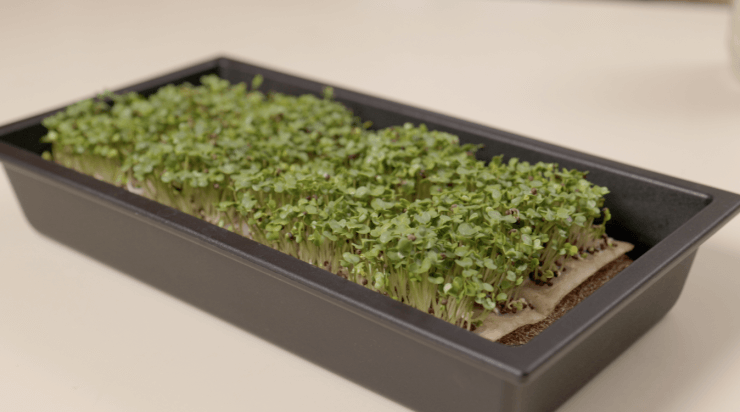
Microgreens, which are the baby sprouts of small plants have been shown to be four to 40 times more nutrient-dense than fully grown vegetables. Red cabbage and cilantro stood out as exceptionally nutritious microgreens, ranking at the top of the scale for vitamin K, vitamin C, vitamin E, lutein, and beta-carotene. They are also dense in flavor. For example, carrot and broccoli microgreens taste very much like carrots and broccoli, but a little more peppery. Basil microgreens taste lemony, kale and pea microgreens are quite sweet, sunflower microgreens are nutty, radish microgreens are peppery, and mustard microgreens are spicy.
At home, I almost always have a batch of microgreens growing because they’re simple to grow, and I prefer to grow them hydroponically (in water) rather than in soil because they’re cleaner that way and I just want to snip and eat them without worry.
The kit I use almost exclusively is from Hamama, a $35 kit that comes with three seed quilts. They almost always have a good sale going on so you can usually get it for even cheaper. To grow these microgreens, you will fill water to the water line in their base, press a seed quilt down for a minute, then watch it grow over the next 10 days, adding water as needed.
You can also create your own DIY version of this kit by getting yourself sheets of coconut husk, soaking them in water overnight, and placing them in a shallow baking dish with about 1/4 inch of water, then sprinkling a generous amount of your microgreen seeds on top. You’ll want to buy a bag of microgreen seeds because you’ll get about 1000 times more seeds than you will by buying a normal seed packet for say, broccoli.
- Pros of growing microgreens: You will always have microgreens on hand for garnish, salads, and beyond.
- Cons of growing microgreens: I can’t think of any cons, they’re not even hard to grow and you don’t have to clean up after them, you just throw away the coconut husk.
Aquaponics (7+ days to harvest)
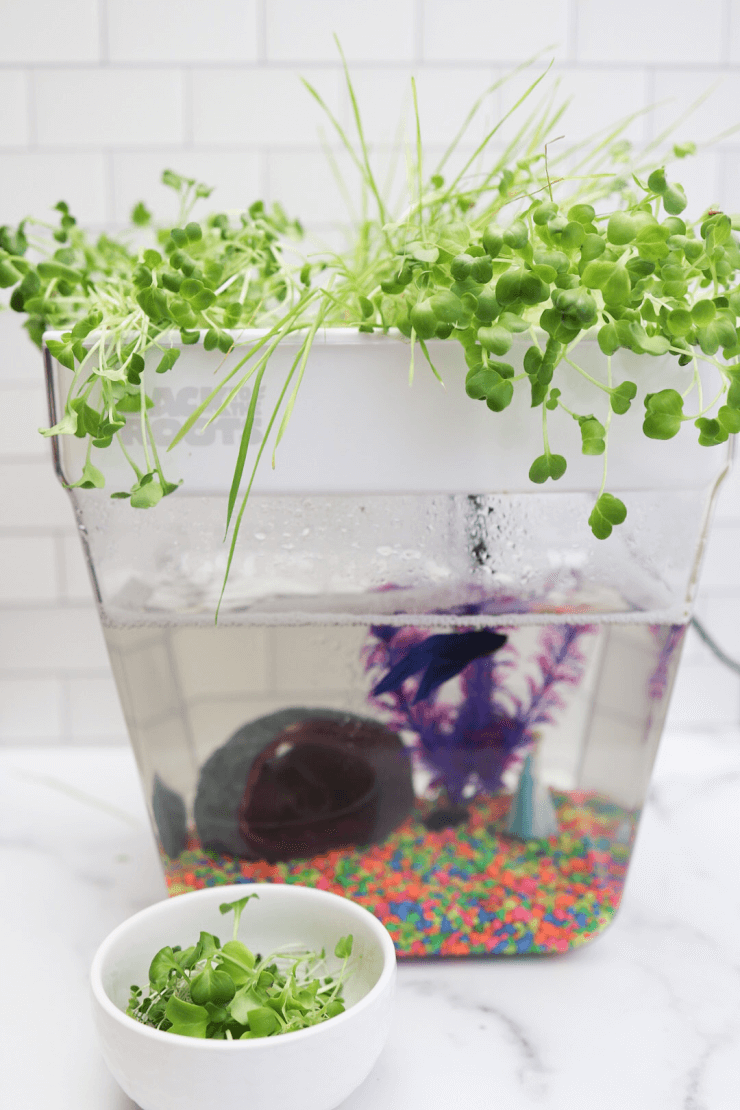
Simple hydroponic gardening gets all the fanfare these days, but we shouldn’t overlook the exciting world of aquaponics, a derivative of hydroponics itself. In an aquaponic system, we are using fish to provide nutrients to the plants through their own waste, while the plants do the fish the favor of filtering the water. The plant roots are suspended in a somewhat sealed chamber above the fish tank, creating a humid environment perfect for roots to grow. It uses a water pump that cycles water continuously through that chamber and drips back into the tank. Like most hydroponic systems, it requires electricity and a growing medium.
In the video above, I’m using the Back to the Roots Aquaponic System.
This was my first time with aquaponics, and we started with a goldfish my daughter named Gabby, who we quickly moved to a much larger tank. Goldfish are, as the store clerk called them, “filthy little fish that produce too much ammonia” for a 2-gallon tank. We added a betta fish named Daniel to the system after that and it was smooth sailing. Daniel even turned from dark black to bright blue, so we assume he’s happier than Gabby ever was in her two-week prison sentence. Sorry Gabby.
The system comes with a growing medium, small rocks that you soak and the seeds can stick to as they grow. We grew radish greens, wheatgrass, and broccoli greens in the first pass and they grew very quickly. I felt like the tank itself stayed very clean as well, as long as they were growing. The thing is though, with a system like this, you use the greens and you start over every 15 to 20 days or so, which means more growing medium every time. If you don’t, they will begin to mold and tiny flies will start circling (ask me how I know).
- Pros of aquaponics: If you already have a fish, particularly a betta fish, this is a great upgrade for them.
- Cons of aquaponics: How many microgreens do you really want to keep growing? They’re also not particularly appetizing if your tank gets that token “fish tank” smell, which can happen no matter how clean you keep it.
Counter-Top Hydroponic Systems (15 to 30 days to first harvest)
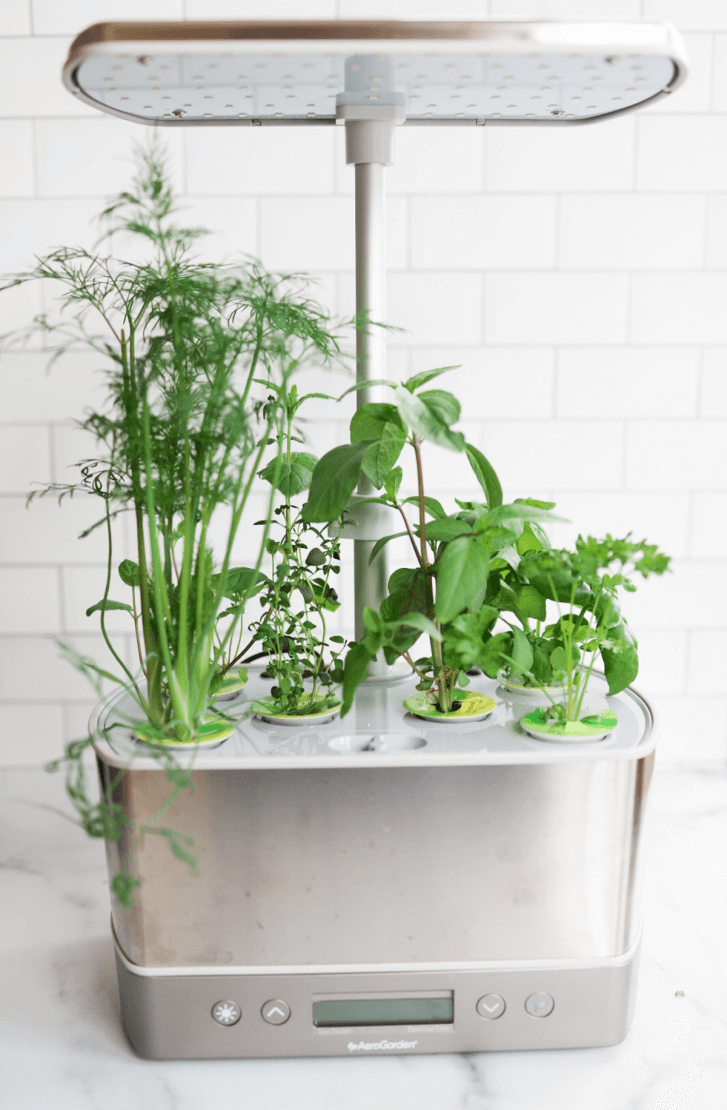
The AeroGarden is a household name when it comes to growing herbs, veggies, and fruit hydroponically and when you buy one of their systems you definitely benefit from their years of experience. In the video above, I am using a six-pod AeroGarden, meaning that I can grow six plants at one time. When you buy an AeroGarden it comes with pods guaranteed to sprout. They are composed of a peat moss compound to hold the seeds, and to grow plants is as simple as it gets.
As you’ll see more in-depth in the video, you simply fill the AeroGarden with water and plant food, pop the pods in, cover them with the domes that come with the pods, and program the device. It will set a schedule to turn the lights and water on, and all you need to do is look for sprouts and take the domes off once they come off. In about 30 days you’ll have a bountiful garden of herbs, which is a fairly fast turnaround, and they’ll continue to grow until they don’t. At that point, you simply toss the pod and start a new one. The device will also tell you when to add water and plant food, and you should clean the system out every once in a while and trim the roots if they start to overtake the system.
- Pros of counter-top hydroponic systems: Easy-to-grow herbs right on your counter where you cook. Fairly simple clean-out and maintenance with very little work to get a good harvest of herbs.
- Cons of counter-top hydroponic systems: They do take up what can be precious counter space, and if you want to grow something bushier like cherry tomatoes you will need something with a taller light and ultimately a lot more space, making it not a simple and compact countertop system.
Vertical Hydroponic Systems (30+ days to first harvest)
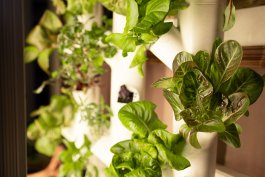
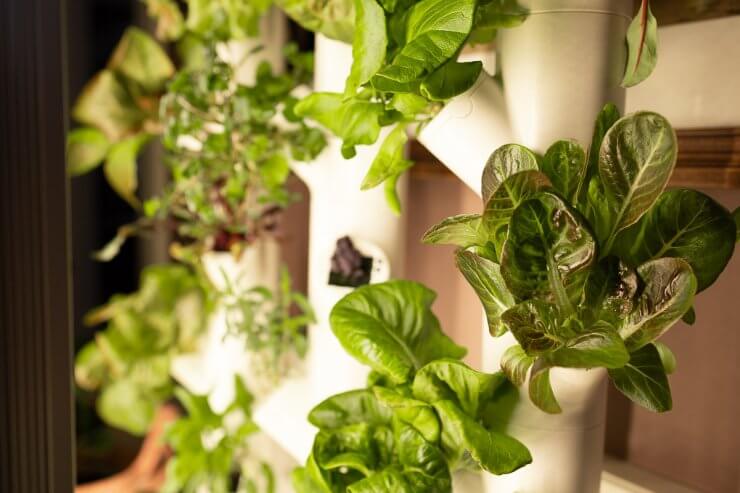
Here’s where we get nerdy, folks. In recent years there have been a few vertical systems that have come out that seem pretty easy to use. But for now I’m standing by my Gardyn system, which has given me a bounty of greens every winter for the last three years. It’s a “smart” garden which means I can program lighting and watering from my phone, there are cameras that allow me to watch my plants while I’m away, and there’s a vacation mode so that I can leave for a week without it running dry. So what is this magical system? Let me tell you about it (and no, we have no affiliation with Gardyn so I’ll give it to you straight.)
The Gardyn is a vertical hydroponic system that has 30 slots for pods, meaning they can grow 30 plants at once. You can buy pods from the company, which include a square of rockwool with seeds, but you can also hack your own pods with rockwool and your own seeds. The benefit of getting pods from the company is mostly ease-of-use and benefitting from their research to find varietals that grow best in their system. Otherwise, you can create your own pods, you just can’t complain to the company about it.
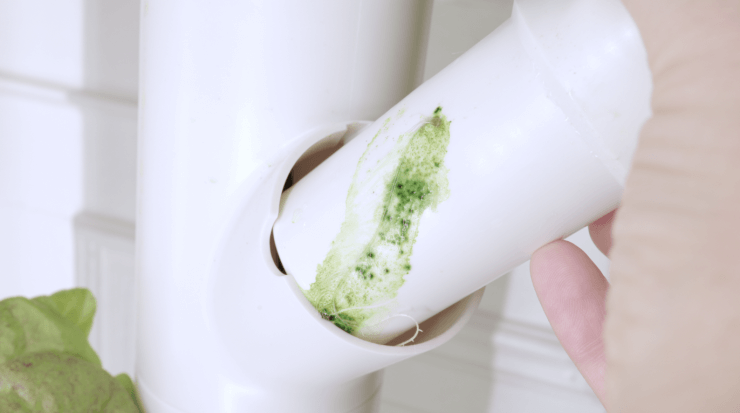
While you’ll get a ton of food from a larger hydroponic system like the Gardyn, I’d be lying if I said it was without any effort. When you get into bigger vertical hydroponic systems, you have more plants, and more problems to worry about. Beyond bugs—which can show up from leaving the door open in the summer, or bringing new plants from the garden store into the same room—you also have algae. Algae is mostly just a way of life when it comes to bigger hydroponic systems because when you combine light and water, you get algae. Since the system is pumping 16 to 20 hours of light a day in a system that’s constantly circulating water, you’re basically farming algae.
That said, algae is more of a cosmetic and cleaning issue than a practical issue for a vertical system like the Gardyn. Algae doesn’t really hurt your plants unless it starts to gunk up your roots, and even then, you can remove pods and rinse roots. I certainly wouldn’t disassemble the system or throw any plants out because of it unless it started to really take over the system. At that point, you’d know because it would be smelly and the algae would begin to absorb all the nutrients your plants should be getting. But if you’re cleaning your system every three to six months, that’s unlikely to happen, and in fact, all hydroponic systems will get some algae. But there are, of course, ways to fight back against it so you can go longer between cleans.
- When you clean the tank, take out the plants and run a solution of water and food-grade hydrogen peroxide through the system. Some folks use bleach, but I don’t really want any residue left in my tank. You can add the plants back in after.
- Use drops of concentrated grapefruit seed extract at every water change (five to 10 drops per gallon), which can help kill any bacteria in the tank, and in the water lines.
- Make sure there isn’t any light getting into the tubes. If you leave any pods open, cover them.
- Get a UV-C light for the tank that is meant for an aquarium, and do what you can to block any light the cord might be letting in, negating your efforts.
- Add a product like Hydroguard every two weeks (10 milliliters), which helps convert organic matter like algae into nutrients that the plants can use.
This sounds like a lot to take on, which is why I’ve saved the biggest system for last, but if you enjoy gardening and science, you’ll really enjoy hydroponic gardening. There’s so much automation that you get in a system like this, too. The Gardyn app allows you to schedule the lights and water. If you pay for the membership you also get 10 pods monthly (too many in my opinion), plus personalized advice based on what the plant cameras on the unit are seeing (such as, “Hey! Time to harvest!”) That said, there’s still plenty of garden-y goodness to tend to, like the darn algae blooms, testing pH, plant foods, and trying out new and fun ways to grow plants like beans indoors. I’ve learned so much about getting plants like peppers to grow into small bushes just by necessity (snip off the tops at the “T”!) and I’ve also learned way more than I ever wanted to know about hand-pollinating. It’s a whole new ballgame, and it’s a lot of fun. Plus, you get to truly garden in the cold of the winter, and get a ton of veggies out of it!
- Pros of a larger vertical hydroponic system: A ton of produce, and lots of new ways to experiment and get up close and personal with individual plants in a way you don’t get when they’re growing outdoors in your garden.
- Cons of a larger vertical hydroponic system: The trials and tribulations of algae, and the epic clean-outs every six months where you need to disassemble the unit and put it all back together again.
If you use any of these systems or others, I’d love to know what your experience is. And I love talking about hydroponic gardening so let me know if you have any questions or great tips by leaving a comment below.


 Previous


Thank you ! I’m a beginner gardener and our season in Atlantic Canada is short. Your education session is great and I plan on starting an aero garden. Seems easy.
I love my aero garden!
I bought the seed starter tray and then plant my starts in trays and slowly acclimate plants to soil and then to outdoor garden! It produces very hardy plants!
Yes! I love that I can start seeds earlier with my hydro garden for outside planting too. 🙂
This is a very informative video, Amanda. Thank you. I am doing hydroponics on a larger scale, but these automated systems make it easy for anyone to get started. It is a great way to expand your gardening season and even bring some garden indoors.
Happy you found it useful! These are definitely gateway systems to bigger and better things!
These systems are really cool. Where do you get your seed? Thank you for all the information!
When I first started I bought the pods with the seeds already in them from the manufacturers, but now I just shop for my own and trial and error what can grow in the system. Lots of fun projects, I just started growing two types of dandilions!