

As a more “earthy” gardener who digs with her hands and often goes barefoot in the garden, I have to admit that until now, I’ve always gone the do-it-yourself route for starting seeds indoors. In the beginning, I would always buy grown seedlings from the incredible farmers co-op down the road from me, but once I started growing my own, they were always planted in everything from eggshells to egg cartons, to BPA-free plastic bottle bottoms.
It seems there’s no real need to get fancy when it comes to starting seeds…but is there? That’s the quest I set out on—to find out if it’s worth buying the heating mats, grow lights, grow trays, and systemizing the whole thing.
And to be honest, I like being a bit scrappy, covering sunny window sills in random containers, and seeing what pops up—no shame there!
But because it’s fun, I decided to test and see which works better, the kit or the old fashioned method of “if you plant it, it will grow.”
The DIY Method
You can plant seeds in just about anything. It’s nice to have drainage, but plenty of people grow seedlings in egg shells for the calcium. Others use the bottoms of water bottles, or egg cartons, or even proper starting trays.
Preferably, get yourself some seed-starting soil. It’s not expensive and it will be sterile, which means it won’t have fungus or carry disease. If not, you can always use regular soil and compost. HGTV recommends the following mixture to make your own seed-starting soil:
- 4 parts compost
- 1 part perlite
- 1 part vermiculite
- 2 parts peat moss
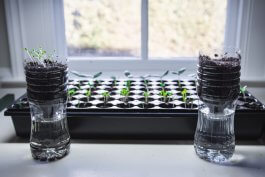
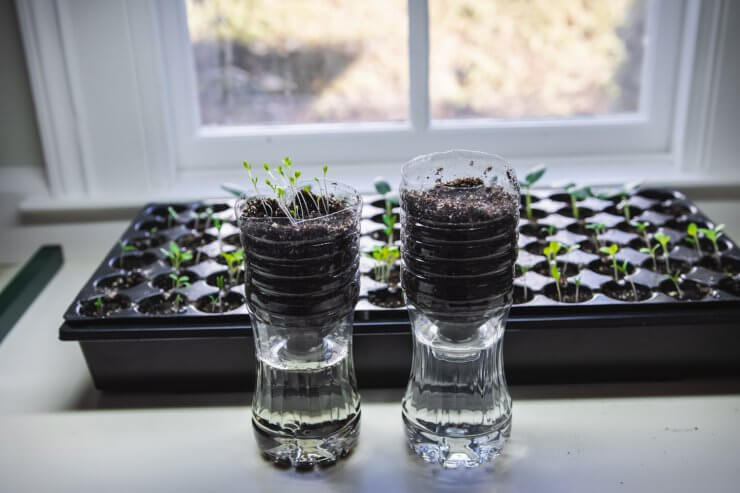
One fun and effortless way to make your own DIY seed-starting “pots” is by cutting a water bottle in half, filling the bottom with water, then turning the top upside down so that the spout is submerged under the water (see photo above for example).
Then, you simply fill with soil, plant your seeds and water. As long as you keep filling the bottom, the top will continue to take water when it needs it. Make sure you only add soil after you fill the bottom with water, otherwise the soil will just fall into the bottom half.
The Greenhouse Effect
Keep the “pots” by a south-facing window in the warmest room of your house. While the seeds are germinating for the first few days, cover the pots with plastic sandwich bags to create their own little greenhouse. Once the seeds start sprouting, you can remove the bags, and then all you need to do is keep the bottom of the pot filled, and the spout submerged under water.
Just like any kit you can buy, seeds will begin to sprout in 3-7 days.
If you have the space for it, are starting in the spring, and have a whole lot of window sills, this is a great method, and it’s the one I’ve personally been using for years.
Starting Seeds with a Grow Kit, Heating Mat, and Grow Light
At any gardening supply store or farmer’s co-op you’ll find seed-starting kits, and they might seem like just a money grab for the occasional gardener, but after removing my pride from the equation and testing the DIY method against the kit, I’ve become quite fond of this kit.
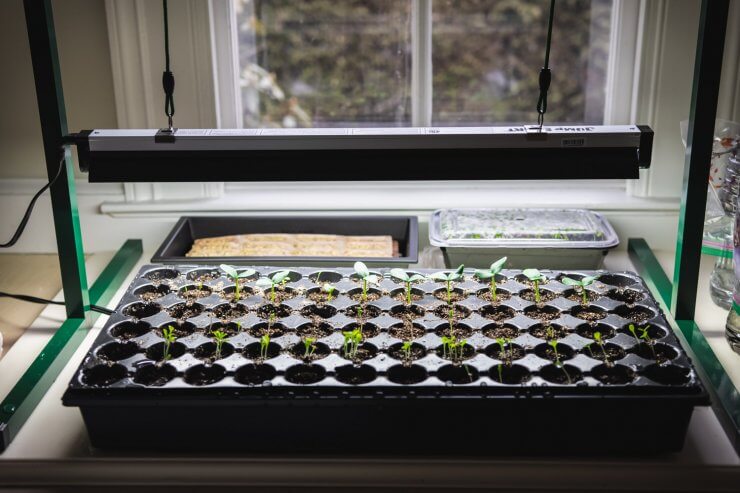
The kit I purchased included the Jump Start Germination Station and 2’ Grow Light System which included the stand and a grow light with a timer (I set it to 18hrs on, 6hrs off).
There’s definitely the nuisance of two cords coming out of this setup—you have the light cord and the heating mat that goes under your plants to keep them warm, so you need to be near an outlet. For me, however, this meant I was able to keep the seedlings alive anywhere in the house, even when I turned the heat down to 55 degrees at night.
The other benefit of using a grow kit is that you can grow a full garden of seedlings in a very small area, no warm window sills necessary.
For this setup, I filled the pods with seedling soil and a variety of seeds like cucumbers, tomatoes, lettuce and cherry tomatoes. I watered the top in the first round, but for the next 10 days I added water to the bottom tray.
The kit comes with a cover to create the greenhouse effect, and it stayed on for the first 5 or so days until most of the pods had sprouted.
To Buy or to DIY?
Once I had the kit and a few dozen seedlings growing in a small space, it became clear to me that I’ve been doing so much more work than necessary.
The DIY method certainly worked, but the clumsiness of the setup was a stressor compared so the compact space and non-maintenance of the kit.
With the kit I was able to plant the seeds, water, cover, and then water from the bottom two or three times when I could see the tops begin to dry out. The seeds germinated effortlessly, and I ended up with a full garden, and even harvested some of the lettuce early as a microgreen.
With the DIY method, the watering was completely effortless, I didn’t need to refill the bottom more than once, but I did worry they were getting too cold at night, and once in a while the dog’s tail would knock the plastic bag off that was covering it to keep germinating.
In the end, both kits worked, though the DIY method took longer for the tomatoes.
All in, the kit is worth the investment and I think my husband will be psyched to clear our windowsills, and it’s come at a perfect time now that our toddler is savvy enough to take them all down herself.
I feel like this is the perfect opportunity to ask YOU how you start seeds in the spring? What method or system do you use?


Hi someone suggested to trim onion seedlings tops question is how much do you cut off hope that makes sense
Our mild comes in plastic bags, each one holds about 1 litre. When they are empty, i cut along the long side so the bag is similar to a canoe. I place 5 peat pellets in each bag with the water the pellets need to swell up, plant the seeds, and roll the plastic bag over. I then loosely seal the top with paper clips and place under grow lights. It works very well providing you get your milk in plastic bags as we do in Ontario.
I use small dixie paper cups the ones used in dispenser I cut a few holes in bottom for drainage for sunflowers i put a hole in bottom to allow for large roors. Using this method allows fir placing it in garden and not disturbing the plant since the cups decomposes.
I put seeds in those mini snack bags, throw in some water, seal, & place them all in a metal edged cookie sheet, side by side, in the sun on the windowsill. ALL were in one tray. In a few days they are sprouting, some with greenery. But keep an eye out, some will be ready a lot quicker than others & will need to be removed & transplanted. I was amazed at how fast they sprouted, and in sealed bags floating in water! No dirt, & no mess.
I am going to try this method this year.
I think I will try this this year. I use TP cardboard rolls. You can plant the whole roll. When starting, you fold in the bottom of the cardboard. When planting. you unfold the bottom to give the roots room to spread.