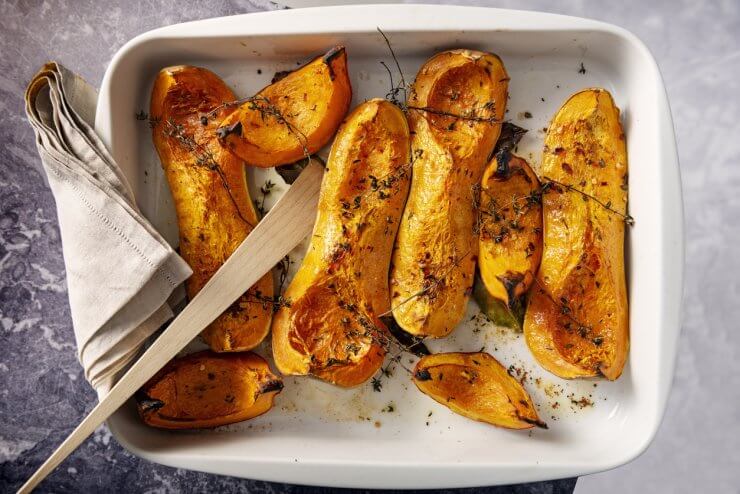
It’s not just pumpkin spice latter season, my friends…the leaves are turning, there’s a nip in the air, and you know what that means – it’s squash-a-palooza, and I have some winter squash recipes to share! That means it’s time to rally up all your favorite winter squash recipe, and if you don’t have any, don’t worry—I do! I swear, these cheeky little gourds spend all summer lazily soaking up the sun, and then BAM! Suddenly it’s like they’re throwing a veggie rave back there.
Now, I’ve got a little tradition when it comes to my squash obsession. Instead of going bonkers and trying every variety at once, I pick one type each year and really get to know it. It’s like dating, but with vegetables (and trust me, they’re much less complicated!). I’ve had my acorn squash phase – what a nutty time that was! Then there was my butternut period – smooth and sweet, just like me. Don’t even get me started on my whirlwind romance with honeynut or my stringy affair with spaghetti squash.
It’s been a wild ride, and I’ve loved every minute of it. Each squash has its own personality, its own little quirks that make it special. And boy, have I learned some tricks along the way! Whether you’re out there growing your own little squash army or just eyeing up those adorable gourds at the farmer’s market, I’ve got some winter squash recipes that’ll knock your woolly socks off.
Discover 9 garden recipes spotlighting the delicious possibilities of home gardens—when you access the FREEBIE Recipes from Your Garden, right now!
So grab your favorite squash (don’t worry, the others won’t get jealous), sharpen that knife, and let’s dive into this delicious autumn adventure together! Who knows? Maybe this’ll be the start of your very own squash era. Trust me, it’s gourd to be amazing!
The Mood: Sweet Autumn Mornings
Winter Squash Bread
No matter what squash era you’re currently in, this Winter Squash Bread will become one of your favorite winter squash recipes because it will be delicious no matter which type you have on hand.
You know those mornings when you wake up and the air is crisp, and you just want something warm and comforting? That’s where this Winter Squash Bread comes in. It’s like a warm hug for your taste buds, and it’s about to become your new breakfast obsession. It’s like pumpkin bread’s cooler, more sophisticated cousin. The pureed squash gives it this incredibly moist texture that’ll have you reaching for a second slice before you’ve even finished the first.
And the spices? Oh man, they’re like a party in your mouth. Cinnamon, cloves, ginger, and nutmeg – it’s autumn in every bite. But here’s the kicker: a splash of orange juice. I know, I know, it sounds weird, but trust me on this one. It adds just a hint of brightness that’ll make you go, “Ooh, what’s that?”
The best part? This bread is a total overachiever. It’s perfect for breakfast, sure, but it also makes a great afternoon snack or a not-too-sweet dessert. I’ve even been known to use it for French toast when I’m feeling extra fancy. Just don’t blame me when your family starts requesting it every weekend!
PrintWinter Squash Bread
A moist and flavorful quick Winter Squash Bread that transforms squash into a warmly spiced treat perfect for breakfast or snacking.
- Prep Time: 15 minutes
- Cook Time: 1 hour 10 minutes
- Total Time: 1 hour 25 minutes
- Yield: Serves 12 1x
- Category: Bakery
Ingredients
- 1 3/4 cups all-purpose flour
- 1 teaspoon baking soda
- 1/2 teaspoon salt
- 1 1/2 teaspoons ground cinnamon
- 1/4 teaspoon ground cloves
- 1/4 teaspoon ground ginger
- 1/4 teaspoon ground nutmeg
- 1/2 cup vegetable oil
- 3/4 cup granulated white sugar
- 1/2 cup packed brown sugar—light or dark, your choice
- 2 eggs
- 1 1/2 cups pureed squash—butternut, acorn, etc.
- 1/4 cup water or orange juice
Instructions
- Preheat over to 350 degrees F.
- Grease a 9×5-inch loaf pan.
- Combine flour, baking soda, salt, and spices in a mixing bowl and whisk together.
- In another bowl, combine the squash puree, eggs, oil, water (or orange juice), and white and brown sugars. Stir until thoroughly mixed.
- Add the dry ingredients to the wet ingredients and stir until just combined; do not over-mix.
- Pour the batter into the loaf pan.
- Bake for 55 to 65 minutes, until a wooden pick inserted in the middle of the loaf comes out clean.
- Put the loaf pan on a cooling rack and allow the bread to cool completely before removing it from the pan.
- Bread will stay fresh, wrapped tightly, at room temperature for two days, or in the fridge for up to a week—if it lasts that long.
Learn more about this recipe in Spiced Winter Squash Bread Brings Autumn to Your Breakfast Table!
The Mood: Cozy and Customizable
Roasted Stuffed Acorn Squash
Now, let’s talk about lunch. You know those Sunday afternoons when you want something that feels fancy but doesn’t require a culinary degree to make? That’s where this Roasted Stuffed Acorn Squash comes in. It’s like Mother Nature looked at your plate and said, “You know what? Bowls are overrated. Let’s eat out of a squash instead!”
The best part about this recipe is how versatile it is. Taco meat for a Mexican fiesta? Go for it. Risotto for an Italian twist? Bellissimo! Quinoa and veggies for our plant-based pals? Absolutely. The acorn squash is like that perfect party host – it gets along with everyone and makes everything look good.
And can we talk about the roasting process for a second? A little water in the cavity, a sprinkle of salt, and into the oven it goes. The result? A tender, slightly sweet squash that’s just begging to be filled with goodness. And don’t even get me started on the aroma that’ll fill your kitchen. It’s like fall decided to give you a big, warm hug.
Oh, and here’s a little tip I learned the hard way: don’t toss those seeds! Give them a quick rinse, toss them with some oil and your favorite spices, and roast them up for a crunchy topping. It’s like nature’s own croutons, and they’re too good to waste.
PrintRoasted Stuffed Acorn Squash
Roasted Stuffed Acorn Squash makes a hearty meal. Acorn squash is the perfect size and shape to hold your favorite filling!
- Prep Time: 30 minutes
- Cook Time: 1 hour
- Total Time: 1 hour 30 minutes
- Yield: Serves 4
- Category: Appetizers
Ingredients
- 2 acorn squash
- 1/2 teaspoon salt
- Water to fill squash cavity
- Filling of your choice: taco meat, risotto, quinoa, rice, or spinach
Instructions
- Preheat oven to 375 degrees
- Wash acorn squash thoroughly.
- Cut in half vertically, from the stem down.
- Scoop out seeds and fibers.
- Retain seeds for roasting.
- Line a high-sided baking pan with parchment paper.
- Lay the squash halves on the parchment paper.
- Pour water into the cavity to fill it about 3/4 of the way.
- Sprinkle salt over each squash half.
- Roast in oven for about an hour, checking for doneness after about 40 minutes.
- Meanwhile, prepare your filling.
- When squash is done, put squash halves on a serving platter.
- Fill each squash half with your chosen filling.
- Serve with side dishes of you
Learn more about this recipe in Savor the Harvest with Stuffed Acorn Squash!
The Mood: Sweet and Sophisticated Sides
Honey Roasted Honeynut Squash
Alright, let’s move on to a side dish that’s so good, it might just upstage your main course. I’m talking about Honey Roasted Honeynut Squash. If you haven’t met honeynut squash yet, let me introduce you. It’s like butternut squash’s adorable little sibling – smaller, sweeter, and packing a flavor punch that’ll knock your socks off.
Now, here’s where things get fun. We’re going to use a little technique called hasselback. Don’t worry, it’s not as fancy as it sounds – you’re basically just making thin slices in the squash without cutting all the way through. It’s like giving your squash a fancy hairdo, and it allows all that butter-honey-sage goodness to seep into every nook and cranny.
And let’s talk about that butter-honey-sage situation for a second. It’s like the holy trinity of fall flavors, coming together in perfect harmony. The butter adds richness, the honey brings sweetness, and the sage? Well, it’s like the cool aunt of the herb world, bringing a touch of sophistication to the party.
I developed this recipe during my honeynut era, and let me tell you, it was love at first bite. For a whole season, it was my go-to side dish for everything from weeknight dinners to fancy dinner parties. Trust me, once you try it, you’ll be looking for excuses to make it again and again.
PrintHoney Roasted Honeynut Squash Recipe
In this recipe for Honey Roasted Honeynut Squash, we hasselback some ultra-sweet Honeynut squash, and bake it in a delicious toasted sage brown butter.
- Prep Time: 20 minutes
- Cook Time: 40 minutes
- Total Time: 1 hour
- Yield: Serves 4 to 6 1x
- Category: Sides & Sauces
Ingredients
- 2 Honeynut Squash
- 8 tbsp salted butter
- 3 large sage leaves, washed and chopped
- 2 tbsp honey
- 1/4 tsp ground cinnamon
Instructions
- Preheat your oven to 350F. Grease a 9″ pie dish or cake pan.
- Peel squashes, cut off the ends and slice down the middle the long way. Scoop out the seeds, then place on a cutting board flat-side down.
- Use a sharp knife to “hasselback” the squash halves by creating thin slices that stop halfway down (see photo for reference) to create an accordion effect, but not too literally. Place in your baking dish in a single layer.
- In a small skillet over medium heat, melt your butter, then add sage. Cook only until the butter begins to brown, then pour over your squashes. Don’t worry if the butter doesn’t get inside all of the slices at this point.
- Drizzle with honey, then sprinkle with cinnamon, then add to the oven and bake for 30-40 minutes, or until soft. Halfway through, use a spoon to drizzle butter mixture from the bottom of the pan over squash again.
- Remove from oven when ready, and spoon butter mixture over the top again, then serve as a side with dinner.
Learn more about this recipe in Sweet and Savory Roasted Honeynut Squash Magic!
The Mood: Comfort Food with a Healthy Twist
Spaghetti Squash Pasta Pies
Now, let me tell you about the time I fell in love with spaghetti squash pasta pie. It was at this little restaurant in Barre, Massachusetts, called Cafe on the Common. They had this spaghetti squash pie as a gluten-free special one night, and I was so smitten, I bought two more orders to take home and freeze!
For the longest time, I dreamed about that spaghetti squash pie. Then one day, I thought, “Why not try to make a version of it myself?” And thus, these Spaghetti Squash Pasta Pies were born.
Here’s the deal: it’s like all the cheesy, saucy goodness of a pasta bake, but without the carb coma afterwards. We’re talking layers of tender spaghetti squash “noodles”, topped with juicy homemade meatballs, smothered in a zesty tomato sauce, and crowned with a blanket of melty mozzarella cheese. It’s like a lasagna and a spaghetti had a low-carb love child, and it’s about to become your new favorite dinner.
The best part? You can bake these bad boys right in the squash shells. Not only does this make for a stunning presentation (hello, dinner party showstopper!), but it also means fewer dishes to wash. And let’s be real, any recipe that results in less dishwashing is a winner in my book. That said, you’re welcome to use a casserole or pie dish.
Now, a word to the wise: spaghetti squash can be a bit watery, so make sure to drain those “noodles” well before assembling your pies. A quick stint in a colander and a gentle squeeze with a clean kitchen towel should do the trick. Trust me, your crispy cheese top will thank you.
PrintSpaghetti Squash Pasta Pies
In these Spaghetti Squash Pasta Pies, tender strands of spaghetti squash are nestled in their own shells, layered with zesty homemade meatballs and tangy tomato sauce, then crowned with a golden blanket of melted mozzarella for a low-carb twist on classic Italian comfort food.
- Prep Time: 10 minutes
- Cook Time: 1 hour 40 minutes
- Total Time: 1 hour 50 minutes
- Yield: 4 servings 1x
- Category: Entrées
Ingredients
- 1 Medium to large spaghetti squash
- Basil or parsley for garnish
- For the meatballs:
- 1 lb 90% lean ground beef
- 1 cup grated parmesan
- 1 tsp chili powder
- 1/2 tsp oregano
- 1/2 tsp basil
- 2 cloves minced garlic
- 2 grinds of fresh sea salt
- 3 grinds of freshly cracked pepper
- 1 large egg
- For the sauce:
- 3 cups pasta sauce
- 1 tsp crushed red pepper flakes
- For layering:
- 2 cups of shredded mozzarella cheese
Instructions
- Preheat oven to 350F. Slice your spaghetti squash in half the long way, using a large knife. Remove the seeds. Place both sides, squash down on a baking sheet and bake for an hour at 350. It’s ready when you can easily use a spoon to scoop out the innards. Scoop them out (preserving the shell) and put in a colander over a bowl to drain. Use a paper towel to pat dry before adding back to shell later.
- Pour your chosen sauce into a medium saucepan over low heat, covered, and add red pepper flakes. Let simmer with the cover on to prevent annoying splashes of sauce all over.
- Mix meatball ingredients in a bowl and roll into quarter-sized mini meatballs.
- Heat a large skillet over medium heat with 1 tbsp olive oil, cook meatballs in the frying pan and cover. Flip when halfway browned (approx 3-5 minutes). When meatballs are cooked through, use a slotted spoon to add them (without the grease and fatty aftermath) into the sauce and let marinate for 10 minutes. Reduce heat to low.
- Put spaghetti squash shells back on the baking sheet if they aren’t already. If they didn’t survive the scooping, use a bread pan instead. In your baking vehicle of choice, layer sauce, squash, meatballs, sauce, mozzarella, squash, meatballs, sauce, mozzarella. Then bake at 350F for 30 minutes.
- Remove from the oven and garnish with chopped basil or parsley. Serve and enjoy
Learn more about this recipe in Savory Spaghetti Squash Pasta Pies Reinvent Family Dinner
The Mood: Classic Comfort Sweets
Crowd Pleaser Pumpkin Pie
Alright, let’s wrap this squash party up with dessert. First things first – we’re talking real pumpkin here, people. None of that canned stuff. We’re going straight to the source with sugar pumpkins. It’s like the difference between instant coffee and a freshly brewed cup of joe. Sure, it takes a little more effort, but trust me, your taste buds will thank you.
Now, let’s talk about spices. We’re taking it up a notch with a blend of cinnamon, ginger, nutmeg, cloves, and the secret weapon – a pinch of cardamom. It’s like a Gilmore Girls spice rack party in your mouth, and everyone’s invited. Oh, and did I mention the lemon zest? It adds just a hint of brightness that’ll make your taste buds do a double-take.
But the real magic happens when you mix all this goodness with rich, creamy heavy cream (or evaporated milk if you’re feeling a bit more virtuous). The result? A filling that’s silky smooth, perfectly spiced, and so good you’ll be tempted to eat it with a spoon before it even hits the crust. (No judgment here – I may or may not have done this myself. For quality control purposes, of course.)
Now, I know making a pie from scratch might seem a bit daunting, especially if you’re used to the convenience of store-bought. But trust me, once you’ve tasted this homemade version, you’ll never go back. It’s like the difference between a hug from a stranger and a bear hug from your favorite grandma – there’s just no comparison.
PrintCrowd Pleaser Pumpkin Pie
Give the traditional pumpkin pie a flavor boost with fresh pumpkin purée you can make yourself. You’ll wind up with our silky, flavorful Crowd Pleaser Pumpkin Pie that will have your guests coming back for seconds! If there’s any left over, it freezes well.
- Prep Time: 30 minutes
- Cooling Time: 2 hours
- Cook Time: 1 hour
- Total Time: 3 hours 30 minutes
- Yield: Serves 8
- Category: Bakery
Ingredients
- 2 large eggs plus the yolk of a third egg (freeze or save the white for other recipes)
- 1/2 cup dark brown sugar, packed
- 1/3 cup white sugar
- 1/2 teaspoon salt
- 2 teaspoons cinnamon
- 1 teaspoon ground ginger
- 1/4 teaspoon ground nutmeg
- 1/4teaspoon ground cloves
- 1/8 teaspoon ground cardamom
- 1/2 teaspoon lemon zest
- 2 cups sugar pumpkin purée
- 1 1/2 cups heavy cream or one 12-ounce can evaporated milk
- 1 9-inch uncooked pie crust, chilled or frozen
Instructions
- Preheat the oven to 425 degrees F.
- Beat the eggs in a large bowl. Add in both sugars, plus the salt, spices, and lemon zest.
- Mix in the pumpkin purée.
- Stir in the cream and beat the ingredients together until well mixed.
- Pour the mixture into an uncooked chilled or frozen pie shell.
- Bake at 425 degrees F for 15 minutes
- Then lower the temperature to 350 degrees F and bake for 45 to 55 minutes longer.
- The pie is done when a knife tip inserted in the center comes out wet, but mostly clean. The center of the pie should be just a little jiggly.
- Crust tip: Put foil around the edges of the crust (or use a pie protector) about halfway through baking to keep the crust from over-browning.
- Cool pie on a wire rack for 2 hours. Serve with whipped cream.
Learn more about this recipe in This Homemade Pumpkin Pie Will Make You Forget Store-Bought!
And there you have it, folks! Five squash-tastic recipes that’ll take you from breakfast to dessert and everywhere in between. But don’t let the squash-ventures stop here! Why not try your hand at a butternut squash soup, or maybe a delicata squash salad? The possibilities are as endless as the varieties of squash at your local farmer’s market.
Remember, cooking with squash is all about embracing the season and having fun in the kitchen. So don’t be afraid to experiment, mix things up, and most importantly, share your creations with the people you love. After all, food always tastes better when it’s made with love and shared with friends.
And if you’re looking for soup recipes, I could have written a whole separate post on them, but my Roasted Winter Squash Soup is definitely a favorite!
Now, I want to hear from you! What’s your favorite way to prepare squash? Do you have a family recipe that’s been passed down through generations? Or maybe you’ve come up with a squash creation that’s so wild, it just might work? Share your squash stories in the comments below. Who knows? Your idea might just inspire my next squash-capade!
Until next time, happy squashing, and may your autumn be filled with gourd times and even better eats!
By the way, our Winter Squash Gardening Guide is now available. Squash has been a popular crop for 10,000 years, and with our guide, you’ll have everything you need to know about growing and enjoying squash of many varieties — from planting to eating!
Let me know what you think about these recipes in the comments!