

Ever peeked beneath a potato plant and wondered how those humble spuds actually form? Unlike the carrots and radishes in your garden that grow from a single taproot, potatoes have a clever trick up their sleeve – they sprout along buried stems like hidden treasures. This quirky growing habit is exactly why potato growers swear by hilling, the almost magical process of mounding soil around their plants as they grow.
By covering the stems with soil or mulch, you’re essentially giving your potatoes more underground real estate to develop, while keeping them cozy and disease-free. Whether you’re a seasoned gardener or just starting out, mastering this technique can transform your potato patch from modest to magnificent. Let’s dig into why hilling works so well, when to do it, and how to adapt it for any growing space – even if you’re working with containers or raised beds.
How Potatoes Grow and Why Hilling Helps
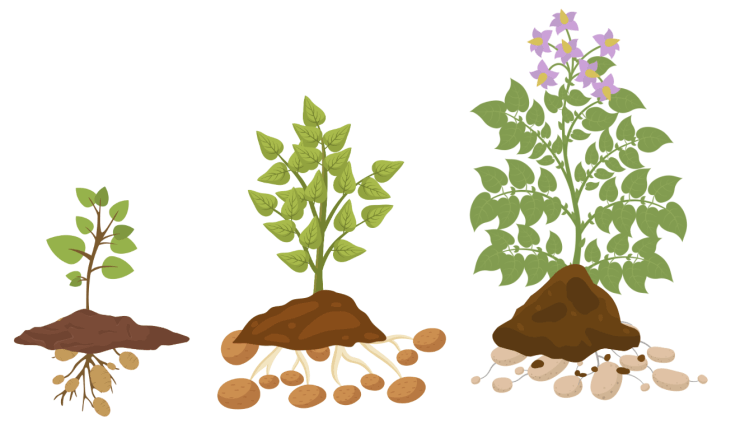
Unlike root crops like carrots or beets, potatoes grow from underground stems called stolons. When a potato seed piece (a cut section of a potato with an eye) is planted, it sends up leafy shoots above ground while producing stolons beneath the soil. These stolons are where new potatoes form.
Hilling Increases Tuber Production
Potato plants only produce tubers on buried portions of their stems. By gradually adding more soil around the plant as it grows, gardeners provide more underground space for stolons to develop, leading to an increased number of potatoes.
Hilling Prevents Green Potatoes
When potatoes are exposed to sunlight, they turn green due to chlorophyll production. While chlorophyll itself is harmless, green potatoes also contain solanine, a naturally occurring toxin that can cause nausea and other health issues when consumed in large quantities. Hilling prevents this by keeping developing potatoes covered with soil, ensuring a safe and edible harvest.
Hilling Protects Potato Plants from Pests and Disease
Potatoes are vulnerable to pests like Colorado potato beetles and diseases such as late blight. A properly hilled plant has more soil coverage, which can help:
- Reduce exposure to airborne fungal diseases by keeping lower leaves off the soil surface
- Deter pests by making it harder for beetles to reach the stems
- Improve drainage to reduce rot and fungal infections
Hilling Insulates Plants Against Temperature Fluctuations
Potatoes prefer cool soil temperatures, and hilling helps regulate soil conditions by providing extra insulation. This is particularly useful in regions where late frosts are common in spring or where summer heat can cause soil to dry out too quickly.
When to Hill Potatoes
Hilling is done in stages as the potato plant grows. The key is to cover the base of the stems without burying too much of the plant too soon.
Step-by-Step Hilling Timeline
-
First Hill (6-8 inches tall)
- Once potato plants reach 6 to 8 inches in height, mound 2 to 4 inches of soil, straw, or compost around the base of each plant.
- Leave a few inches of leafy growth exposed to allow continued photosynthesis.
-
Second Hill (12-16 inches tall)
- When the plants grow another 6 inches, add another 2 to 4 inches of soil.
- Repeat until the mounds reach 10 to 12 inches high in total.
-
Final Hill (Before Flowering Begins)
- Once plants start forming flower buds, stop hilling. At this stage, most tuber development has already begun.
How to Hill Potatoes: Best Methods
Hilling can be done using different materials and techniques depending on your garden setup. Here are a few of the most effective approaches:
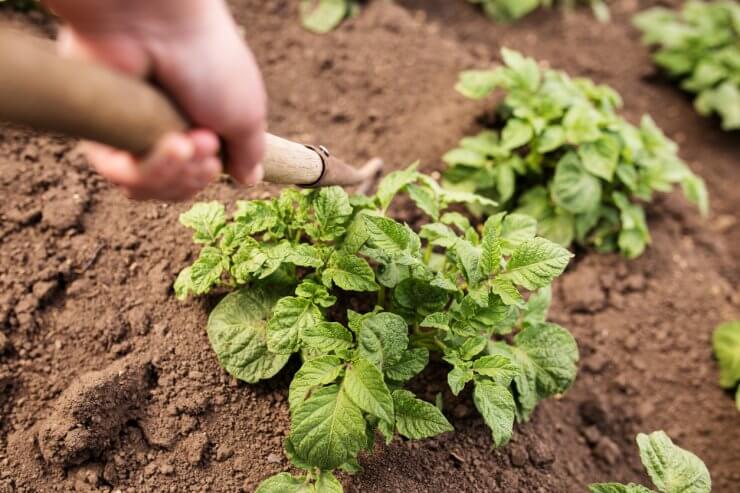
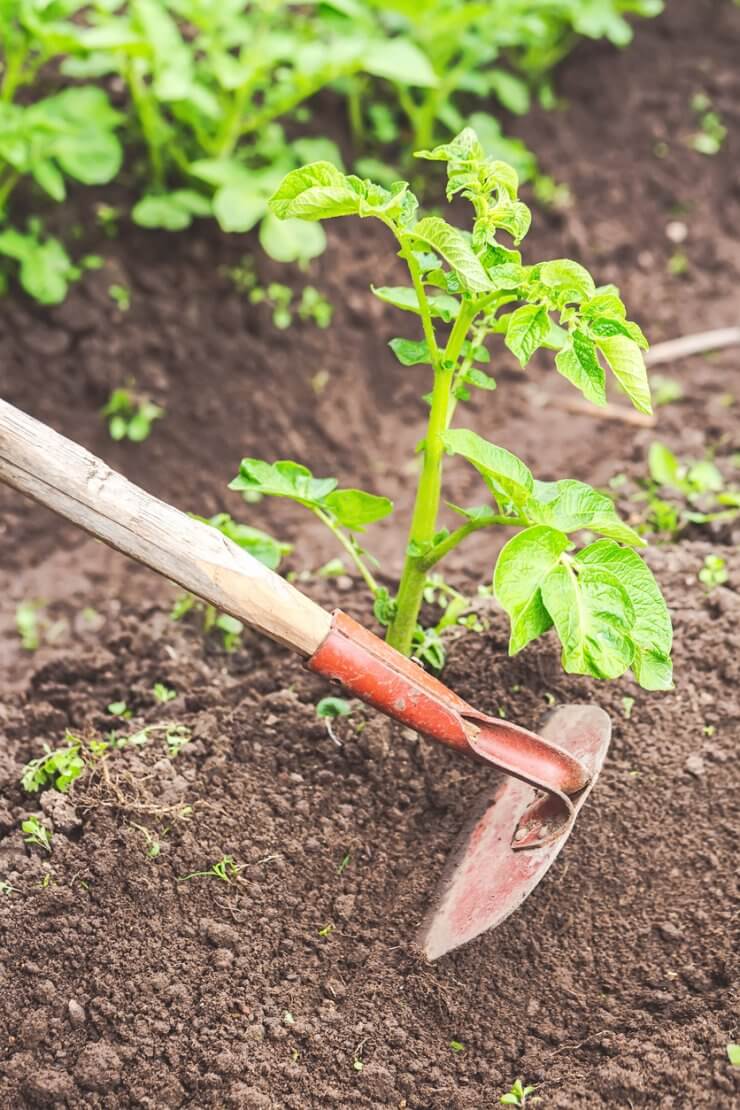
1. Traditional Soil Hilling
- The most common method is using a hoe, rake, or shovel to pull loose soil up around the base of each plant.
- Ensure no tubers are exposed, as they will turn green and become inedible.
2. Straw or Mulch Hilling
- Instead of soil, some gardeners use straw, shredded leaves, or grass clippings to hill potatoes.
- This method keeps the tubers covered while reducing water loss and weed growth.
3. Raised Bed or Container Hilling
- If growing in raised beds or large containers, you can simulate hilling by adding extra layers of soil or mulch as the plants grow.
- Some gardeners use grow bags and roll up the sides as they add more soil.
4. No-Dig or Deep Mulch Method
- Instead of planting potatoes in trenches and hilling them, some gardeners simply layer potatoes under a deep mulch from the start.
- As plants grow, more mulch is added, reducing the need for soil hilling while still encouraging tuber growth.
Common Hilling Mistakes to Avoid
1. Hilling Too Late
- If you wait too long and potatoes have already formed close to the surface, they may become green before hilling is done.
- Start early and keep up with growth to prevent exposure.
2. Burying Too Much of the Plant at Once
- Plants need sunlight to produce energy. If you cover too much foliage too quickly, it can slow growth.
- Always leave at least 4 to 6 inches of leafy growth exposed after each hilling.
3. Using Heavy or Compacted Soil
- Clay soil that becomes compacted can restrict stolon growth and reduce yield.
- If your soil is heavy, consider mixing in compost, straw, or shredded leaves to keep it loose and aerated.
4. Forgetting to Water After Hilling
- Adding soil or mulch can dry out the base of the plant. Water thoroughly after each hilling to maintain proper soil moisture.
Hilling potatoes is a simple yet powerful technique that leads to higher yields, better quality tubers, and healthier plants. By consistently adding soil or mulch around the stems, you encourage more tuber production, protect the crop from greening and disease, and insulate the roots from temperature extremes.
Whether you grow potatoes in a traditional garden, raised beds, or containers, mastering the art of hilling will ensure a bountiful and successful harvest. With our Potatoes Gardening Guide, you’ll learn all you need to know about growing and enjoying these fabulous root vegetables.
What other methods do you use to grow big, healthy potato crops?