


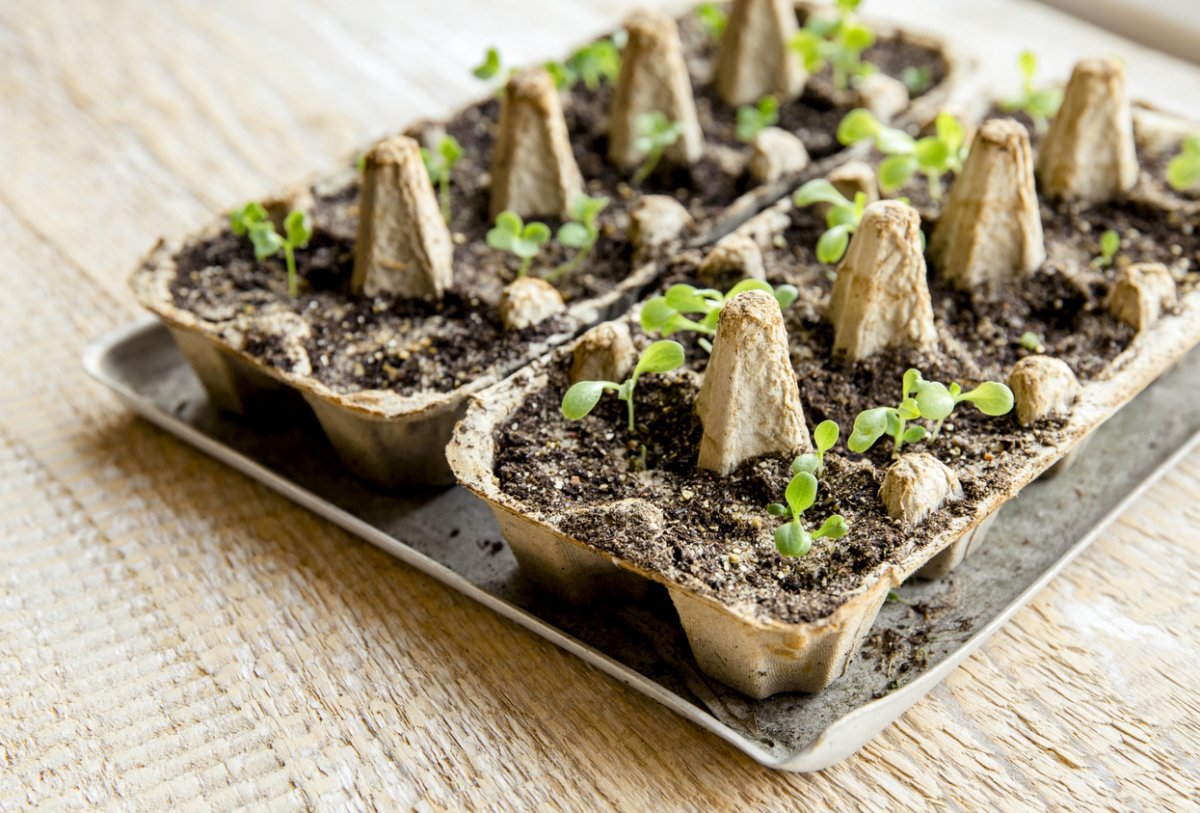
Egg cartons, like popsicle sticks and pipe cleaners, are one of the quintessential craft items for school projects. You can turn an egg carton into a bird feeding tray or a spaceship. It’s perfect for holding odds and ends in your cupboard. And it’s perfect for gardening, but starting seeds in egg cartons isn’t just a fun biology experiment.
There are a lot of good reasons to get your garden started this way. For one thing, you can get a dozen starter cups free when you buy your eggs. Free is good. Plus egg cartons are biodegradable, so you can plant your egg carton seedlings directly into the soil when the time comes.
Discover 7 top tips for growing, harvesting, and enjoying tomatoes from your home garden—when you access the FREE guide The Best Way to Grow Tomatoes, right now!

10 Easy steps for starting seeds in egg cartons
- Select the right egg carton. There are a lot of advantages to starting seeds in egg cartons, but if you choose the wrong carton, you’ll miss out on almost all of them. You want a paper-based egg carton for this. Styrofoam and plastic containers won’t give you the same benefits.
- Select the right sized egg carton. How many plants do you want to start? Six, twelve, eighteen? Get the size that matches the number of plants you want to grow.
- Separate each egg cup. This isn’t immediately essential, but you’ll have to do it eventually. Taking care of this now will make transplanting much easier when you get to that point. Cut or tear each cup so you have individual containers.
- Poke holes in the bottoms of the egg cups. Even though egg cartons are absorbent, a small drainage hole won’t hurt anything, and it could help water drain more quickly if you add too much.
- Add fresh soil. Fill the egg cups about halfway with fresh soil.
- Add your seeds. Some people will plant two or three seeds per cup, understanding that not all of the seeds will sprout. Personally, I prefer to just go with one seed per cup, that way I don’t have to do any extra transplanting once the seeds start growing. It’s really up to you, though.
- Cover with soil. Simple enough. Add enough soil to cover your seeds to the appropriate depth.
- Place your egg cups (now seed cups) on a tray or plate. When you water them, the water will drain. Also, the seed cups are porous, so water will escape through the container.
- Water your seeds. You’ll most likely need to water them every day, but don’t overdo it. Always check your soil first.
- Place them in a sunny spot. Sunlight, soil, and water are really all your seeds need. Find a nice sunny spot for your seeds to live. It’s really fun to watch them every day as they start to grow.
When the time comes, you can plant your seeds directly into the garden. The egg carton material will decompose, so you can feel comfortable putting it in the ground. And until that happens, the roots of the plant should have no trouble breaking through the material, so you don’t need to worry about that either.
Have you used an egg carton for starting seeds? How did it go? I’d love it if you shared your story in the comments.
Discover 7 top tips for growing, harvesting, and enjoying tomatoes from your home garden—when you access the FREE guide The Best Way to Grow Tomatoes, right now!


11 replies on “10 Tips for Starting Seeds in Egg Cartons”
Just be careful about which egg cartons you use. I have noticed a lot of companies are now coating the cartons with a wax type substance. That coating my not be good for the seed germination and it holds water.
Yes I have used egg cartons to plant those seeds. especially enjoyed by elementary students…they just love tyis activity. i usually get these seeds started around February and they are just right for planting out come May. Some little plants get a bit long and leggy but can be held up with a wooden skewer and this support can stay in place right out into the garden.
Great idea. I’m not quite sure how soon I can start planting into my garden outdoors so this will help in case I’m late getting started.
Hi! I have been using egg cartons for a few years (then transplant to paper cups, then to the garden eventually). But I cant figure out how to effectively label them. I trued ball point and Sharpies directly on each egg receptacle (what’s a word for one egg holder?!), but as time marches on, the markings get fuzzy and unreadable. I’ve tried toothpicks and made “flags” with markings, but those dont stay put. Any good ideas?
I saw people create a map on a piece of paper. Just identify a starting point with a colored marker , like the front left blue, and write down what’s in the holes.
I’ve always loved this idea, as I use toilet paper rolls … but …. I’ve also always worried the egg cartons don’t provide enough base for the roots to grow. Are there only certain plants to start in egg cartons?
Yes, you said egg crates but you don’t say what kind. Can you use the plastic kind?
I’m saving up toilet paper rolls as we speak. Time to start my garlic seeding soon.
I’ve used egg cartons for seed propagating as well. It works really well and I love the way the whole little egg cup can be planted so there’s no shock to the root system that may cause problems when transplanting. I’ve also used cardboard toilet paper rolls or cardboard kitchen rolls for the same thing. With the rolls, I usually put a scrunched up piece of kitchen paper in the bottom to prevent the potting mix from disappearing out of the base 🙂 These little hacks make such a big difference when getting your seedlings organised and under way. So good for the environment too.
I use empty cardboard toilet paper rolls cut in half, eliminates hole poking and separation of cups and can cover with plastic wrap for self watering.
Great idea!