

Picture this. You’re in your shed organizing your garden tools and you come across a few rogue seed packets. Were those from this year? Maybe the year before. Are these the ones that your cousin’s neighbor’s brother passed along during a seed swap? Or the ones you bought from a big box store? If only there was a way to test seed viability. Lucky for us all, there are several ways to test if seeds are still good.
Many seed packets will contain sell-by dates and other information indicating the age of the packet and recommended planting year. But sometimes you don’t have a packet with information and instead have little more than a mysterious masking tape label that says “tomatoes.” Regardless of what your seed container looks like, or whether you’ve saved seeds from your own crops, it’s a good idea to test seed viability. For one thing, it prevents you from wasting time, energy, and money on planting seeds that are unlikely to germinate. It’s also a good practice to adopt as part of your seed inventory maintenance.
Discover 7 top tips for growing, harvesting, and enjoying tomatoes from your home garden—when you access the FREE guide The Best Way to Grow Tomatoes, right now!

Seed Packet Terminology
Before getting into the different methods to test seed viability, let’s briefly review some seed packet terminology you might notice on your store-bought seed packets. While not directly related to seed viability, it’s important to understand what kinds of seeds you are planting.
- Non-GMO: Seeds have not been engineered genetically
- Heirloom: Seeds that have been saved and passed down from one generation of small and local farmers to the next without any modification. In true technical terminology, heirloom varieties must have been passed down for at least 50 years.
- Organic: Seeds have been harvested from plants grown without synthetic fertilizers, genetic engineering, pesticides, or irradiation.
- Hybrid: Seeds from plants that have been cross-pollinated with different, but related plants over several generations.

How to test seed viability
Soak method
This is a great method to test seed viability for larger seeds, like pumpkin seeds, as well as older seeds. It doesn’t work so well with really small seeds since those tend to remain on the water surface.
- Add seeds to a container of water and let soak.
- Check the container in three hours and notice if any seeds are still floating.
- Seeds that sink are generally more viable than seeds that are floating.
- After 12 hours, skim the floating seeds off the top of the water surface and toss them in garbage or compost.
- Use the remaining seeds by sowing them in your favorite potting medium.
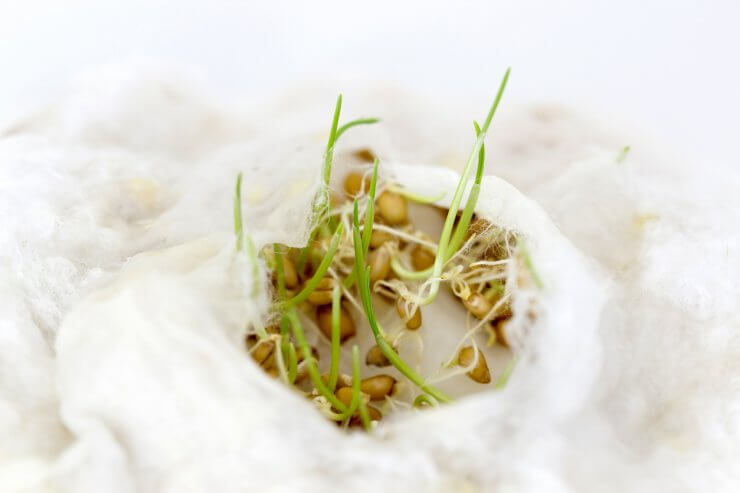
Paper towel method
An easy way to test seed viability is to take 10 seeds and place them on a moistened paper towel. The paper towel should be damp to the touch but not soaking wet.
- Wrap or fold the paper towel around the seeds and place seeds and paper towel in a sealable sandwich bag.
- Place the bag in a warm location like the top of your refrigerator or a sunny windowsill.
- Check on the bag every couple of days to make sure it hasn’t dried out and spray with water if necessary.
- In about five to seven days, carefully unfold the paper towel to reveal your seeds. Count how many have started to germinate and identify the germination rate of your 10 seeds. (i.e. 7 seeds out of 10 = 70% germination rate).
Ideally, you want to use seeds that have a seed germination rate of 70% or higher. But, even if the rate is a bit lower, it just means you should sow more seeds a little closer together.
Sand method
If you plan to transplant germinated seeds directly into your garden, use the sand method to test seed viability. Similar to the paper towel method, the sand method allows for germination to occur and sprouts to grow upward (similar to how they’d grow in soil or potting mix).
- Spread a thin layer of clean, moist, sand in a tray or other short-walled container
- Spread 10 seeds out on top of the sand
- Add another thin layer of moist sand to cover the seeds
- Spray the tray of sand every day or so to keep sand moist (not fully saturated)
- Depending on the seed, germination could take anywhere between 5 days and two weeks
Count how many seeds have sprouted to identify your germination rate, and carefully transplant your seedlings into your favorite potting medium or garden soil.


Once you’ve tested your seeds, be sure to label the packets and envelopes with identifying information as well as the germination rate and test date. That will come in handy the next time you’re shuffling through your seed packets deciding what veggies to plant.
Do you have a favorite method to test seed viability? Share your tips in the comments!
Discover 7 top tips for growing, harvesting, and enjoying tomatoes from your home garden—when you access the FREE guide The Best Way to Grow Tomatoes, right now!