

Hey there, fellow wheat enthusiasts! Today’s adventure took me from the golden fields of wheat to the warm embrace of my home, where I explored the age-old craft of turning wheat berries into whole wheat flour. The journey, peppered with a bit of history, a dash of curiosity, and a sprinkle of flour, was nothing short of magical. So, grab your aprons and let’s dive into the delightful world of home milling!
A Brief Wheaty History
Before we embark on our flour-making escapade, let’s take a quick stroll down the historical wheat lane. From the time of the Pilgrims, milling wheat has been a cornerstone of American agriculture. The iconic windmills and watermills of early America were the first flour factories. Over time, technology evolved, and giant stones gave way to more sophisticated milling methods, paving the way for the diverse flour options we enjoy today.
Back to the Present: Wheat to Flour
Now, with 1000 square feet of wheat under the till, we’re ready to put on our modern-day miller hats and transform those golden grains into heavenly whole wheat flour for 90 loaves of bread. Here’s a step-by-step guide to get you started:
Ingredients:
Wheat berries (harvested with love)
A sprinkle of excitement
Equipment:
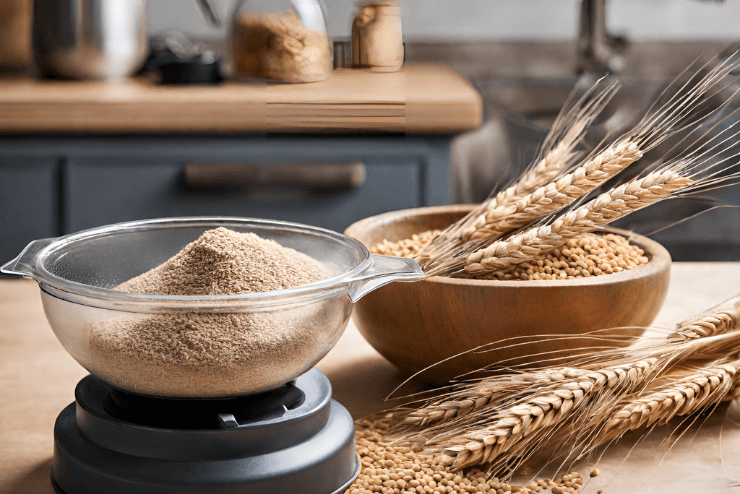
Wheat Grinder/Mill: Invest in a good-quality wheat grinder or mill. You can choose between manual and electric options, depending on your preferences.
Sifter: To separate the flour from any residual bran, a sifter comes in handy.
Storage Containers: Keep your freshly milled flour in airtight containers to preserve its freshness.
Step 1: Harvest the Wheat
Gaze upon your bountiful wheat field, ready for harvest. A touch of nostalgia might hit you as you think about the Pilgrims doing the same in centuries past.
Step 2: Clean and Dry
Before milling, ensure your wheat berries are clean and thoroughly dried. No one likes a soggy loaf!
Step 3: Milling Magic
Place the wheat berries in your trusty grinder or mill. Watch in awe as the kernels transform into a beautiful, golden flour. The fragrance alone is worth the effort.
Step 4: Sift Away
For that extra refined touch, pass your flour through a sifter to remove any remaining bran or impurities.
Step 5: Store and Savor
Transfer your freshly milled whole wheat flour into airtight containers. Breathe in the satisfaction of a job well done.
Step 6: Bake Away
Now that you have your homemade whole wheat flour, it’s time to unleash your inner bread maestro. Bake those 90 loaves of whole wheat goodness!
Conclusion: Flour Power!
From the wheat fields to your kitchen, the journey of milling your own whole wheat flour is a rewarding endeavor. As you enjoy the fruits of your labor, take a moment to appreciate the rich history of wheat milling that spans generations.
So, my fellow flour aficionados, go forth and let the flour fly in your kitchen – you’re now a bona fide wheat whisperer!