


I never even knew what rockwool was before I started a hydroponic garden three years ago. To me, seeds sprout in soil, so why use anything else? However, now that I am germinating seeds all year long using an indoor garden that uses rockwool, I think it’s the easiest thing ever. Environmentally sound though? Let’s talk about it, and how to start seeds in rockwool.
Rockwool, which has the consistency of fiberglass and is made in a very similar way, has been around since it was invented in the 1970’s for gardening. Prior to that, it was used as insulation by the names mineral wool or stone wool. Someone along the way discovered that it’s in impeccable growing medium because it holds enough water, but not too much, doesn’t stunt roots, and is perfect particularly for hydroponic systems, though it can be used outdoors too (more on that later).
What Is Rockwool?
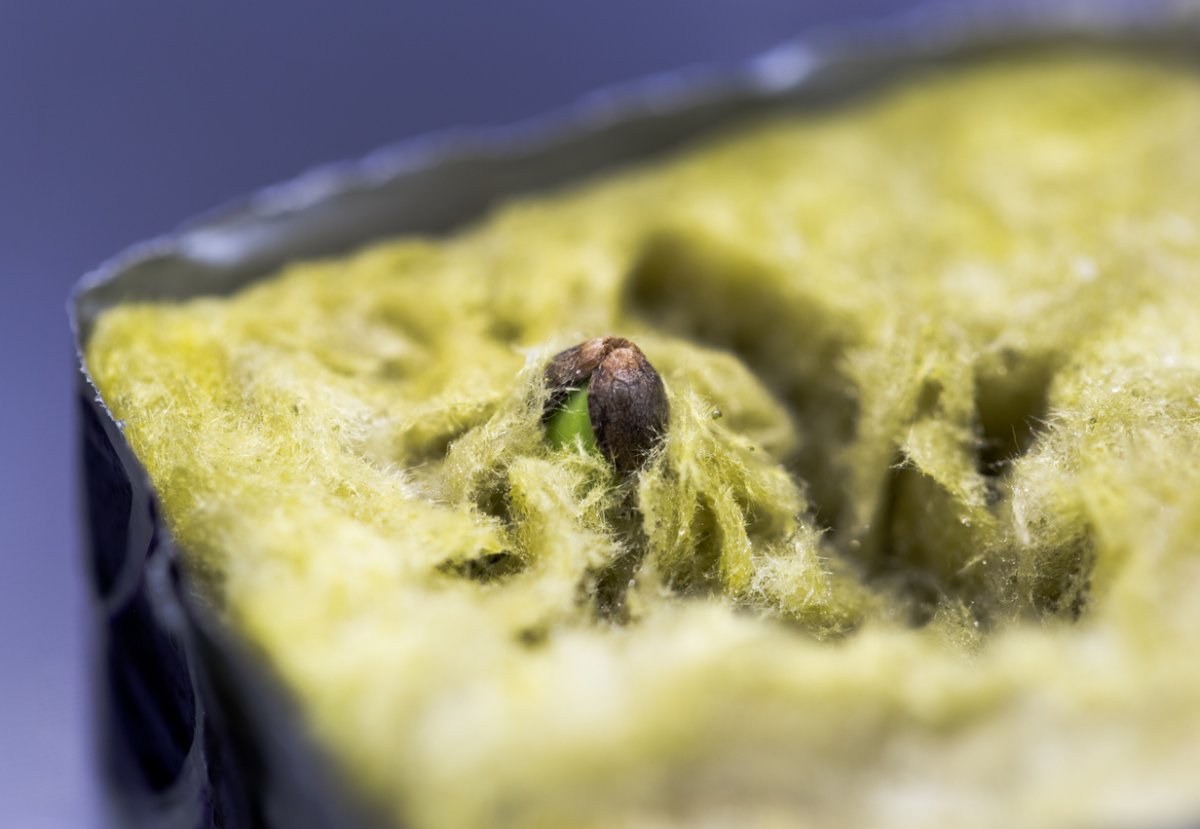
In hydroponics, rockwool is one of many different types of growing mediums, arguably the best because it holds what seems like the perfect amount of water and oxygen within the fibers without waterlogging seeds or seedlings. Unfortunately, it’s the least organic. Rockwool is made of natural basalt rock and chalk, but it’s melted at extremely high temperatures, then the melted fibers are spun like cotton candy, compressed, and sold.
Horticultural rockwool is available in different sizes of seedling propagation cubes, plugs, blocks, and slabs. I specifically like using the cubes for the ease and convenience of transplanting them later. They are readily available in most gardening supply shops, particularly in hydroponic grow stores. Many of these stores also sell online as well, so you can get it delivered even if you don’t have a hydroponics store near you.
Rockwool doesn’t break down, can’t be composted in the traditional sense, and would ideally not go into a landfill. It can however be sterilized and re-used, and worst-case scenario you can break it up and sprinkle it in your garden soil as a way to compost it.


Discover 7 top tips for growing, harvesting, and enjoying tomatoes from your home garden—when you access the FREE guide The Best Way to Grow Tomatoes, right now!
Balancing Out the pH
Before we get to how to start seeds in rockwool, there’s an important preparation step that should happen first – balancing the pH. I’ve already covered the importance of testing for soil pH in vegetable gardens in a previous article, but it’s worth saying again. Knowing the pH level of your medium is essential, and that goes for when you’re learning how to start seeds in rockwool, too.
Seeds germinate best in a medium with a pH of 5.5 – 7.0.
Rockwool has a pH of around 8.0 because of the way it’s produced. The heat and lime deposited in the fibers kill off the acidity and raise the pH. To make it great for germination, then, you’ll need to make it slightly more acidic.
That said, you know as well as I that seeds can and will grow if they want and when they want. When you see tomato plants growing out of cracks in your driveway, you know what I mean. And let’s not even get into raspberry bushes!
But if you want to offer up an ideal environment you can either start your seeds in a wet paper towel to give them a head start, or adjust the pH of your rockwool. I prep my rockwool days before using it by washing it in acidic water. You can use distilled water, and most gardeners do, but if you have a rain bucket, I like collecting and recycling naturally acidic rainwater so I always have a bucket ready for my rockwool cubes. That’s my geekery speaking and distilled water is definitely the route most folks go.
The advice I have used for lowering the pH came from Trees.com:
The first step in preparing rockwool cubes is to soak them in acidic water to lower the pH. The acidic water will dissolve the lime that is formed on the fibers during the manufacturing process and the pH will drop to a better level.
It is best to use distilled water because of its purity but tap water can work in a pinch if it is the only thing available. Adjust the pH slowly until it reaches the desired 5.5; it is critical the pH doesn’t drop below 5.0 since it will start to damage the rockwool fibers when it is too acidic.
Then submerge the rockwool cubes in the water and allow them to soak for up to 24 hours. When they have finished soaking, remove them from the water and carefully add them to the hydroponics system and allow the system to run without any plants until the pH of the system stays between 5.5 and 6.0 — this means the cubes are stable and can be used.
Once you’ve checked their pH levels to make sure they’re good, then you’re all set!
A Step-By-Step Guide on How to Start Seeds in Rockwool
The prepping is pretty much the biggest step here. You are now ready to start germinating your seeds once your rockwool cubes have been prepped. To use rockwool as a seed-starting medium, here’s how you can do it:
- Use a toothpick to make one or two small holes, then place seeds in the holes. Alternatively, you could simply press seeds into the rockwool, but it depends on the size and fragility of your seeds, so I don’t like to make that a blanket statement of direction.
- Use the toothpick to brush the rockwool back over the seed (s).
- Place the seeds in a dish with ½ inch of water, and cover. A super simple solution is to put a large glass in the middle of your dish then wrap the whole thing in plastic wrap, so it will keep the plastic off the top of the rockwool, but will also create a greenhouse effect. Bonus points if you use a heated germination mat under and/or a heat lamp above. This will improve germination rates.
- Always feed rockwool from the bottom, so as the seedlings start to sprout, simply add more water to the dish to keep it full, and remove the sprouts from your mini greenhouse once you start to see true leaves on them.
- If you’re using a hydroponic garden, you can add them to your garden at this point. If you’re planning to transplant outside, keep the plants under a heat lamp until mature and ready to be transplanted.
Transplanting Your Rockwool Seedlings
So you might be wondering if seeds grown in rockwool can survive on soil, or will they only thrive in hydroponics? Personally, I’ve tried both methods, and I’ve found them to be equally successful.
You can directly transplant your cubes into your garden if the weather is good – yes, cubes, seedlings, roots, and all!
You can also place the rockwool seedlings in a bigger block of rockwool and continue caring for the plant hydroponically. Just cut into a 4-inch rockwool block or larger and place your rockwool seedlings inside.
To Use or Not To Use Rockwool
Rockwool has properties that promote better seedling success rates than soil, or other soilless media. That being said, it might not be for everyone. Here I’ve listed some benefits and disadvantages of using rockwool.
Benefits of Using Rockwool
Rockwool has proven to be very useful and convenient for me when I’m growing my vegetable seeds. The main benefit of it is that it only retains a certain amount of water, so you won’t accidentally drown your seedlings and sabotage their growth. Here are the biggest benefits I see:
- It retains moisture and oxygen well
- You can reuse it to grow anything from seed
- It’s can be sterilized with boiling hot water and used again
- It’s easy to monitor nutrient levels
- It’s an ideal soilless medium for hydroponic systems
Disadvantages of Using Rockwool
While I enjoy the benefits of using rockwool, there are a few disadvantages.
- It needs pre-treatment to lower its pH level
- It doesn’t break down ever, so it’s best to sterilize with boiling water and re-use or shred and disperse evenly in your garden beds.
- If you’re not careful, the fibers may irritate your eyes, skin, or lungs, so best to wear a mask when trimming it.
- The initial investment can be pricey, but it’s comparable to the cost of seedling soil and trays.
Overall, I love using rockwool because my germination rates are so much higher than in soil. I don’t generally plant rockwool in soil, and I use and often re-use it in my hydroponic garden, though I do find it handy when I can’t wait to start my tomato plants and am able to start them just a little earlier in the winter knowing I can put them into my hydroponic garden for a bit before I plant them outside.
Now that you know how to start seeds in rockwool, let me know what other questions you have and I’ll try to help. And if you made it this far, I’ll give you a bonus tip: rockwool is excellent for rooting your cuttings!
Comment below and let me know how things go.
Discover 7 top tips for growing, harvesting, and enjoying tomatoes from your home garden—when you access the FREE guide The Best Way to Grow Tomatoes, right now!


4 replies on “How to Start Seeds in Rockwool”
Is rockwool , moss? sorry about the. last message.
Rockwool is made from rock and minerals that are melted and spun into fiber.
I rockwool, moss?
Great article, this is my first time trying rockwool. How do I test for Ph levels? Do I just test the water? Thanks