


Confession time! Most of my houseplants are within 30 feet of my kitchen. I’m an absent-minded indoor plant waterer. If it’s not within 30 feet of my sink, there’s a good chance I’ll forget to water it. I have a beautiful rubber tree on the second floor of my house that I have (on several occasions) nearly killed from forgetting to water it. Enter self-watering plant bulbs! Also known as “plant nannies,” or “watering globes,” these self-watering plant bulbs are a plant lifesaver. They’re great if you sometimes (ALWAYS) forget to water your plants. They are also ideal for vacation plant watering.
It’s worth noting that you should consider the plants you want to pair with these self-watering plant bulbs. For instance, it’s probably not a good idea to use these on cacti or succulents, as those plants don’t require regular watering and will begin to rot with too much moisture.


Discover 7 top tips for growing, harvesting, and enjoying tomatoes from your home garden—when you access the FREE guide The Best Way to Grow Tomatoes, right now!
I love using recycled materials both in my indoor and outdoor gardens. You can buy self-watering plant bulbs online or at your home and garden store. But with some recycled bottles and a couple of household items, you can make your own for free! Here are some variations using recycled plastic and glass bottles. In all methods, you’ll want to start with watering the plant and saturating the soil fully before inserting your self-watering plant bulb. Otherwise, the bottle will drain quickly and you’ll need to refill it. I also recommend getting the self-watering bulb deep enough and close to the root ball of each plant.
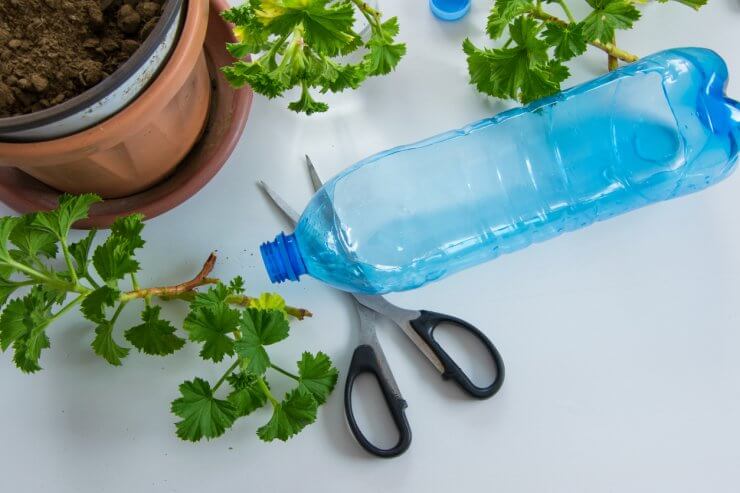

Plastic bottle method
You can convert 16-20oz plastic bottles, or even one-liter plastic bottles into self-watering plant bulbs with a candle and a nail. For houseplants, I don’t recommend a two-liter bottle, however, you may find use for that larger size in your garden. Light a candle and carefully hold the nail in the flame to heat it up. You may need to use an oven mitt to hold the nail as it will get hot! Once the nail is hot, poke a hole in the center of the plastic bottle cap. You can also poke a hole or two in the neck of the bottle if you wish for faster water drainage. Then, fill the bottle with water (you can add fertilizer or other nutrients, too). Screw on the cap and place cap-first into the soil of your houseplant.
Glass bottle no cap
If you have a glass bottle, either a small glass soda bottle or even a wine bottle, you can fill it with water and bury the neck of the bottle toward the root of your house plant. A cap or cork is not always necessary, especially if the plant has been thoroughly watered beforehand.
Glass bottle cap or cork
If you find that the bottle is draining too quickly, you can add a cap or cork. You’ll need to create a hole in the top. For a screw-on metal cap, use a hammer and nail to punch a hole through the center. Use a similar method for creating a hole inside a cork, though I recommend using the foam/plastic style cork instead of a real cork.
Bonus: half DIY / half buy
If you’re like me and love the idea of DIY but need a little more structure, you may want to invest in these terracotta spikes that you place your glass or plastic bottles into. Simply soak the terracotta spikes in water, and push them into your plant so the soil is nearly flush with the spike opening. Fill your bottle and tip into the spike.
Have you recycled bottles into self-watering plant bulbs? How did it work out? Let me know in the comments!
Discover 7 top tips for growing, harvesting, and enjoying tomatoes from your home garden—when you access the FREE guide The Best Way to Grow Tomatoes, right now!


7 replies on “How to Make Self-Watering Plant Bulbs From Recycled Bottles”
You could use an electronic soldering iron with a small diameter round tip to put the hole in the cap. No danger to fingers, but just make sure its owner knows to clean it off before allowing it to cool.
An easy way to make a hole is to warm an ice pick or other sharp point on the electric burner. Super fast!
Hi, I like your watering hack. What I’m trying is to put water in the water bottles, just a little, enough to give me a hard frozen surface to work with. Then I put the bottles in the freezer to freeze. Once frozen, I can take a good firm nail and hammer holes into the ice at the bottom. Then I allow the water to thaw and drain. Once empty, I can “plant” the bottles with the seeds, top up for easy refilling. I’ve tried the globes with only fair success. My trouble, I guess, is I forget to pre-water the plant thoroughly first. Live and learn. I’m still experimenting with my way, so I only believe it will work, kind of a DIY olla. Thanks again for sharing.
I do this all the time as I travel a lot and have many plants. I use a sharp knife to punch the hole in the cap. (Be careful) I am gone for 2 months sometime and return to plants that are still alive. I have one
large plant that I use the large bottles. I put two bottles in this plant. All of this is for indoor plants. I am beginning to use this method on my outdoor plants.
We wash empty pasta sauce or 24 oz tomato cans, turn them over and put holes in the bottom with small nails. When put in the ground near the plants, they are easy to fill and provide water for a couple hours. Only takes a couple minutes to refill a dozen of them with a hose.
Not to have to pull it out all the time I like to cut the bottom of my plastic bottle and refill that way
I tried doing the nail/candle thing before. It works but takes awhile. What I do now is to use a small electric glue gun (sans glue stick) or a wood-burning tool if I am doing several bottles at a time. I don’t have to wait for them to reheat so I am done much faster. And my fingers don’t get as many burns.